The Old City of Jerusalem is a must for any serious photographer visiting Israel. There are also many fabulous opportunities for amateur travel photographers to get great photos of Jerusalem.
There are so many fascinating things to see and do in Israel but Old City Jerusalem has an incredibly unique energy, one rarely found anywhere else in the world. Jews, Christians, Muslims and Armenians share a tiny area of 0.9 square kilometres, home to some of the most historic and revered sites in the world.

As it has been for centuries, the Old City is a place of worship and pilgrimage. A place for tourism, business and trade. A city of spirituality and history, while it is beautiful, it can sometimes be tense. But above all, Jerusalem is incredibly fascinating.
Religious landmarks, open-air markets, souvenir stalls and food vendors create an exciting photographic atmosphere. Then there are the people. There are so many fantastic photographic opportunities for every style and level of photographer.

On our recent tour of Israel, we spent a week exploring and photographing Jerusalem. Much of this time was spent photographing the historic Old City. During this time we looked for the best photography opportunities including locations and time of day. We also identified some of the challenges.
Whether you are a travel happy snapper with a smartphone or a serious travel photographer, these tips should help you make the most of your time and get the best possible images of Old City Jerusalem.
How to Take Great Travel Photos
Know Your Camera
While many of these tips will be specific to photographing Old City Jerusalem, many apply to any travel photography. The first and most important tip for any travel photography is knowing your camera.
Unlike many other styles of photography, travel photography doesn’t always allow you the luxury of time to get the shot right. Or, to be in the right place at the right time. Knowing the settings on your camera is invaluable especially when you are travelling.
These 7 quick tips to learn about photography will help you understand your camera settings and terminology better.
So before you leave on your trip, sit down and read your camera’s manual. You may think; how boring, but you will be surprised at what helpful tips you can pick up in the camera’s instruction manual.
Take the time to go through and program all the settings. If you Google the best settings for your model of camera, you will usually find some very helpful resources on the set and forget settings for various styles of photography. Things like setting maximum ISO which we talk about later.
Then, play with all the shooting settings, so you know how to find them more intuitively when you start taking pics on the move.
Get Your Bearings
As we talked about in our Dubrovnik Travel Photography Guide, If you have the time, we highly recommend taking a walk through the Old City first or even better, taking a guided tour.
This will help you get your bearings within the relatively small, but complex walled city, load you up with information and help you assess lighting conditions and equally as important, crowd conditions.
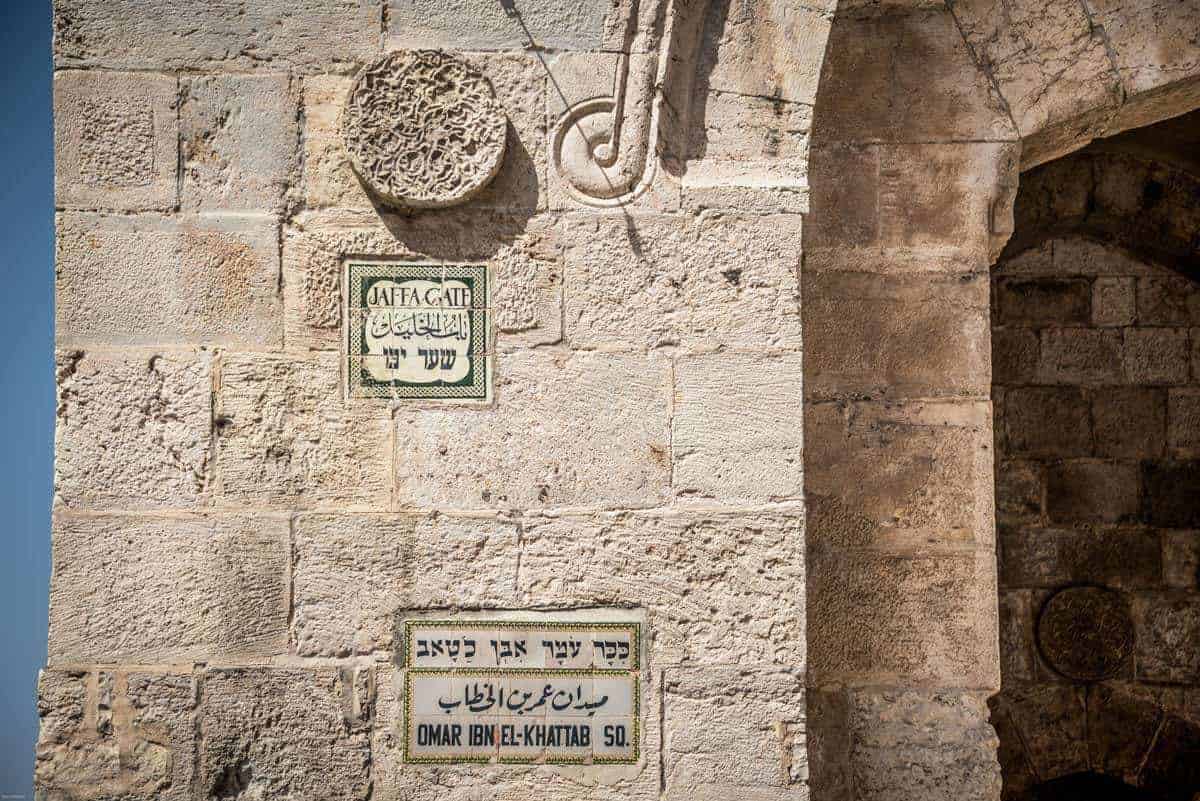
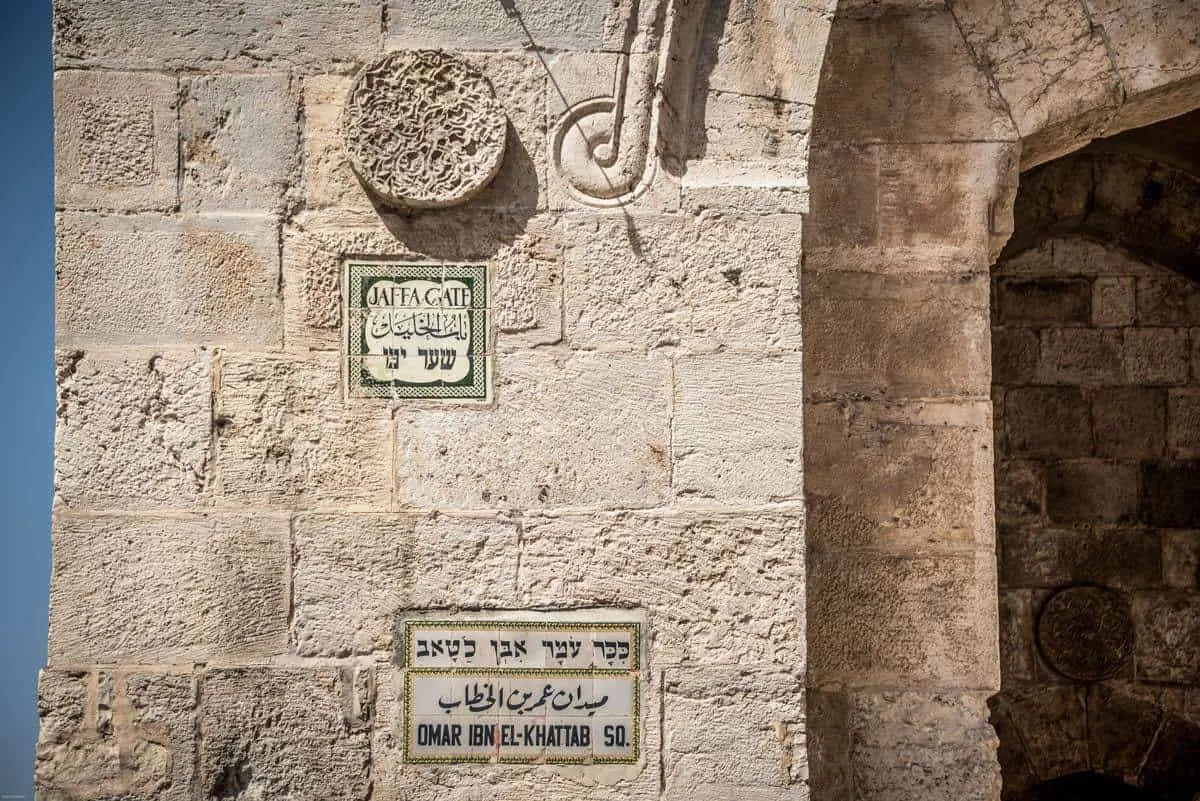
TIP: If you are not already on a scheduled tour, free walking tours leave from Jaffa Gate twice a day starting at around 11.00 am. Beware, you may come across some dodgy tour guides who will try to tell you there are no free walking tours. Go to the info centre if in doubt.

TIP: While you are walking around, stop to look through the postcard racks. We often find this an invaluable source for location hunting and lighting scenarios. You may find inspiration for shots you may not have thought of before.
Lighting
Dynamic Range
The biggest problem you will encounter with any old city such as Jerusalem is lighting. With narrow streets and high walls, you will come up against various dynamic range challenges, in particular on a bright day.
However, all is not lost. The harsh lighting contrast of shadow and light can produce some fantastic results so use it to your advantage.
While dynamic range can offer great effects, it may not always be the look you are after. Funnily, this can be a bigger challenge with a good DSLR such as our Nikon D850 than with a smartphone. Especially if you are not familiar with using your camera’s metering modes.
Use Your Metering Modes
If you have a camera with multiple metering modes (most cameras do), it might be worth playing around with these before you go. If you find a subject within a highly contrasted scene, switching to “centre weighted” metering, (some camera’s call this “portrait” metering) usually works pretty well. Instead of the camera trying to evaluate the entire scene, this gives you more control over what your camera will use to evaluate the exposure required.
You can use this mode to focus on a subject in the centre of the frame, and extremely bright and dark areas will mostly be ignored. In some cases, it may blow out the surrounding brighter areas of your frame, but that’s ok because your subject will be properly exposed. You can always drop the highlights later in any basic editing program.
Smart Phones
For smartphone users, dynamic range shouldn’t be so much of a concern. Just tap the screen in the area of the subject you want to expose, and most phones will do the rest for you. There are so many great mobile phone photography tips, taking great photos with your phone is quite simple.
Our iPhone does a surprisingly good job in normal photo mode at evaluating the exposure for high dynamic range scenes. Many phones will give you the option to increase the exposure of the area you have selected, just don’t be tempted to push it too far.
Most smartphones now have the ability to enable HDR photography. This functionality combines three shots taken at different stops of exposure. It then conveniently stitches them together for you, so the scene is more evenly exposed. The HDR mode works best when you have your phone on a tripod, but a steady hand will suffice.
TIP: We also use the ProCamera App which gives us full manual functionality on the iPhone and enables us to shoot RAW. It also gives you multiple video shooting resolutions right up to 4K with the ability to set frame rates from 24fps through to 60fps. We have shot some fantastic quality videos on our iPhone using this app.
If you are comfortable with editing and processing your photos later, shooting RAW on any camera or device will give you greater flexibility and a much better result. Especially with high dynamic range situations in retrieving detail in the shadows.
Reflection
Another factor in Jerusalem is the reflection generated from stonework can create issues with clipping or blown-out highlights. It can even overexpose or wash out an entire scene. In this case, if you have one, a polarising filter may be useful with overly bright scenes. This will help to cut any over the top glare and introduce more colour saturation into your final pics.
There are some very reasonably priced filter kits for DSLR cameras and some cool clip-on filter lens sets for smartphones.
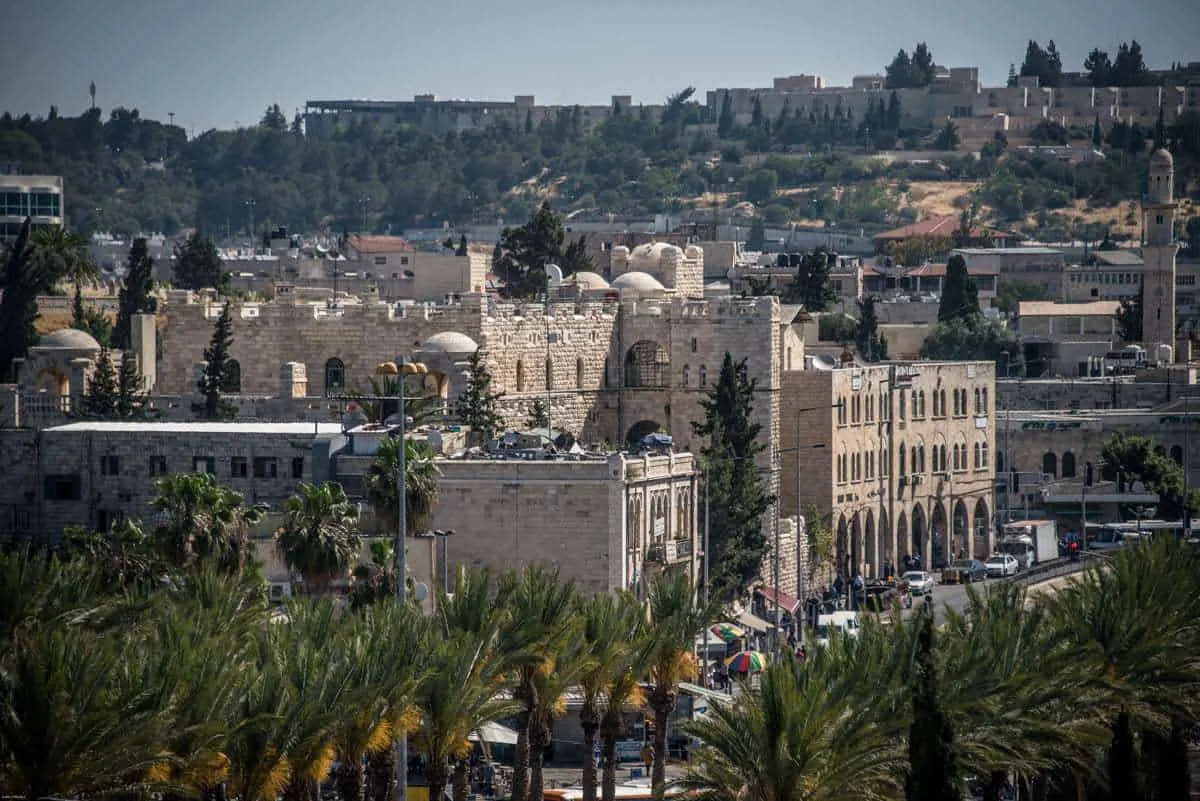
Get Out Early, Stay Out Late
To combat some of these lighting issues, planning a photography trip to the Old City early in the morning and later in the afternoon makes good photography sense. It also means you don’t have to suffer the heat of the day. Jerusalem can get very very hot. The middle of the day should be for a sensible siesta or eating falafel in a shady cafe.
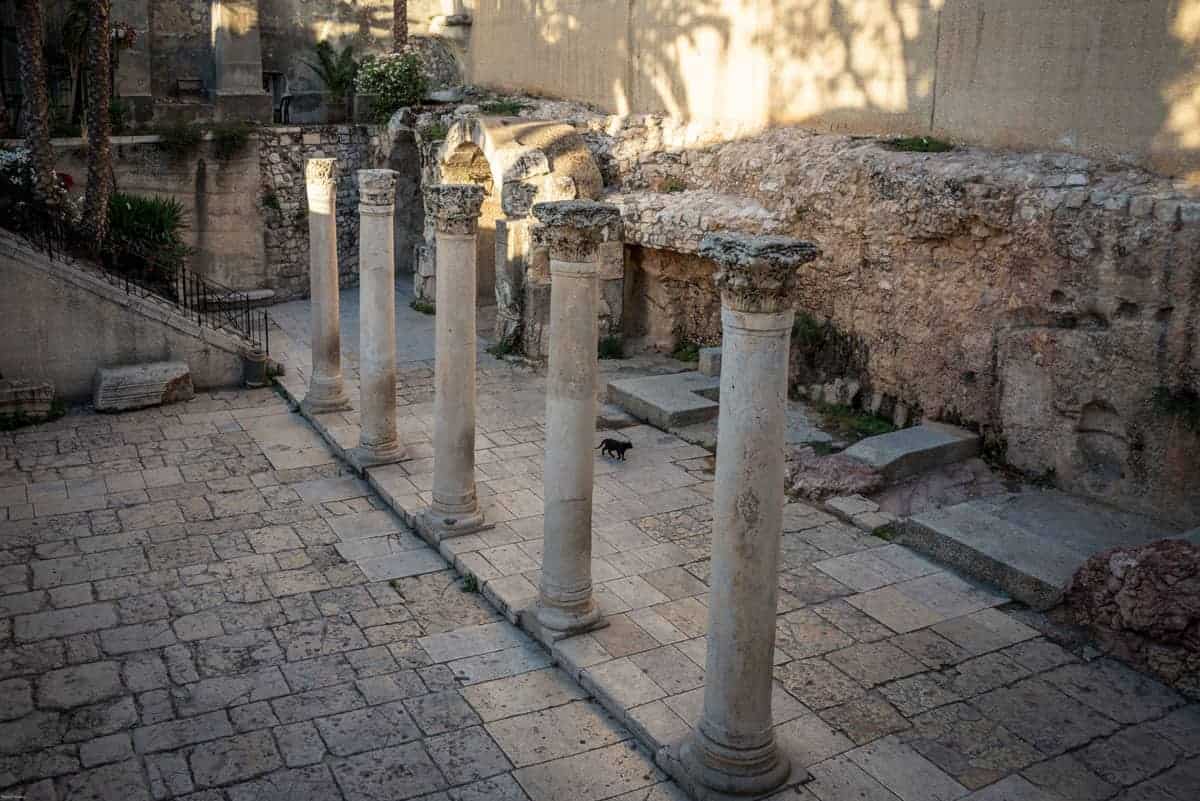
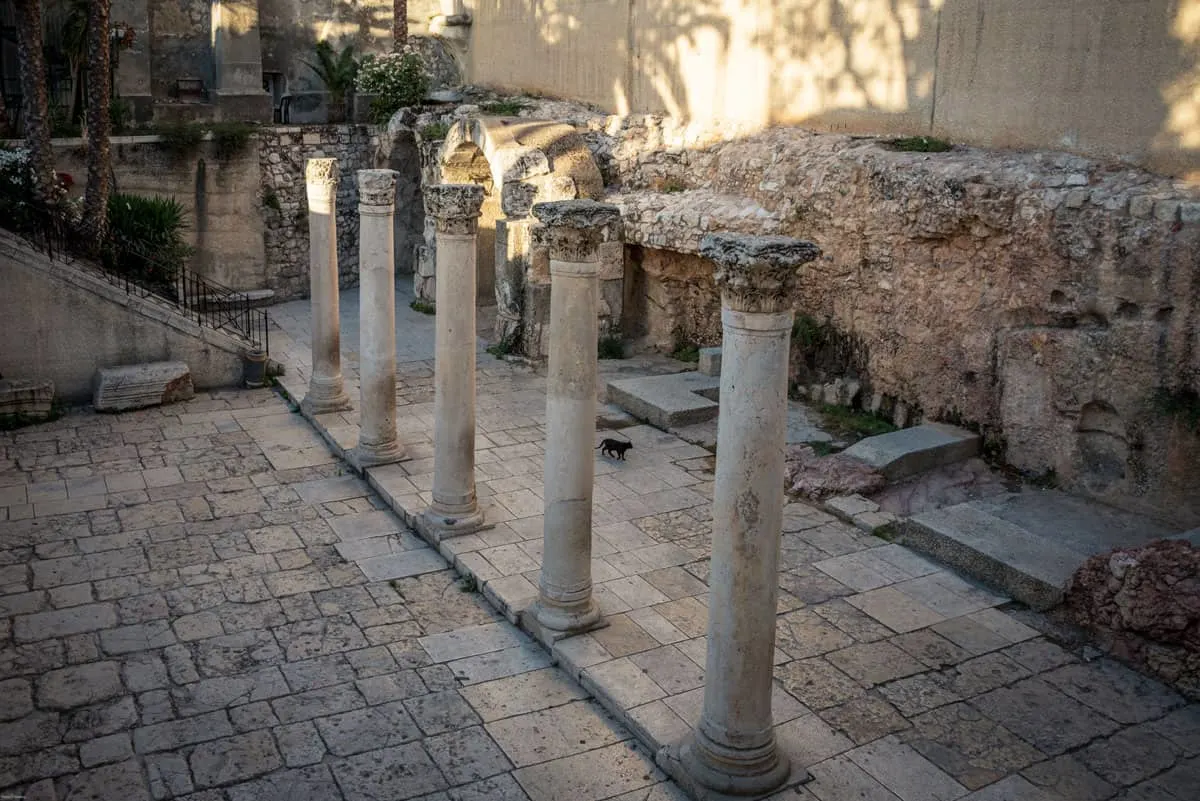
By heading out at either end of the day, you can avoid the brightness of the glaring Israeli sun reflecting off stonework and take advantage of some softer or more attractive lighting. Not to mention, the lack of crowds.
We took these photos between 7.00 and 8.00 in the morning. The light is much softer and the contrast of shadows less challenging.

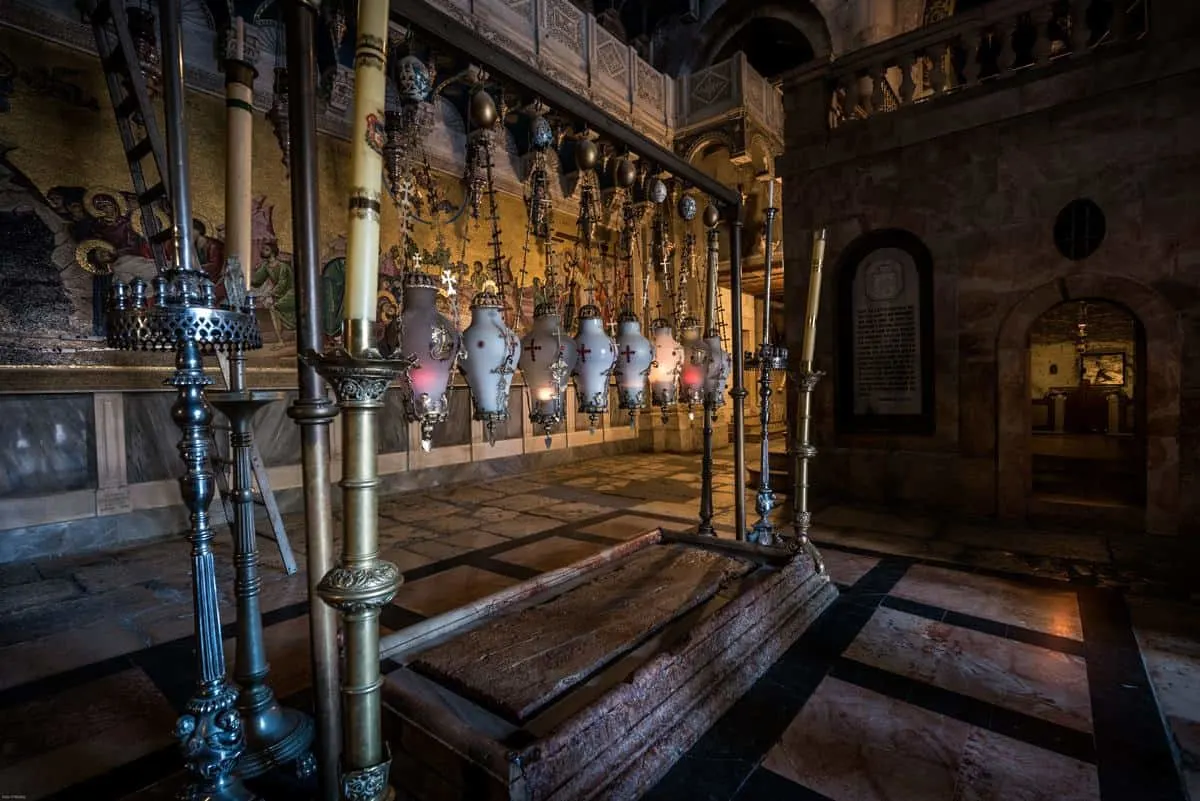
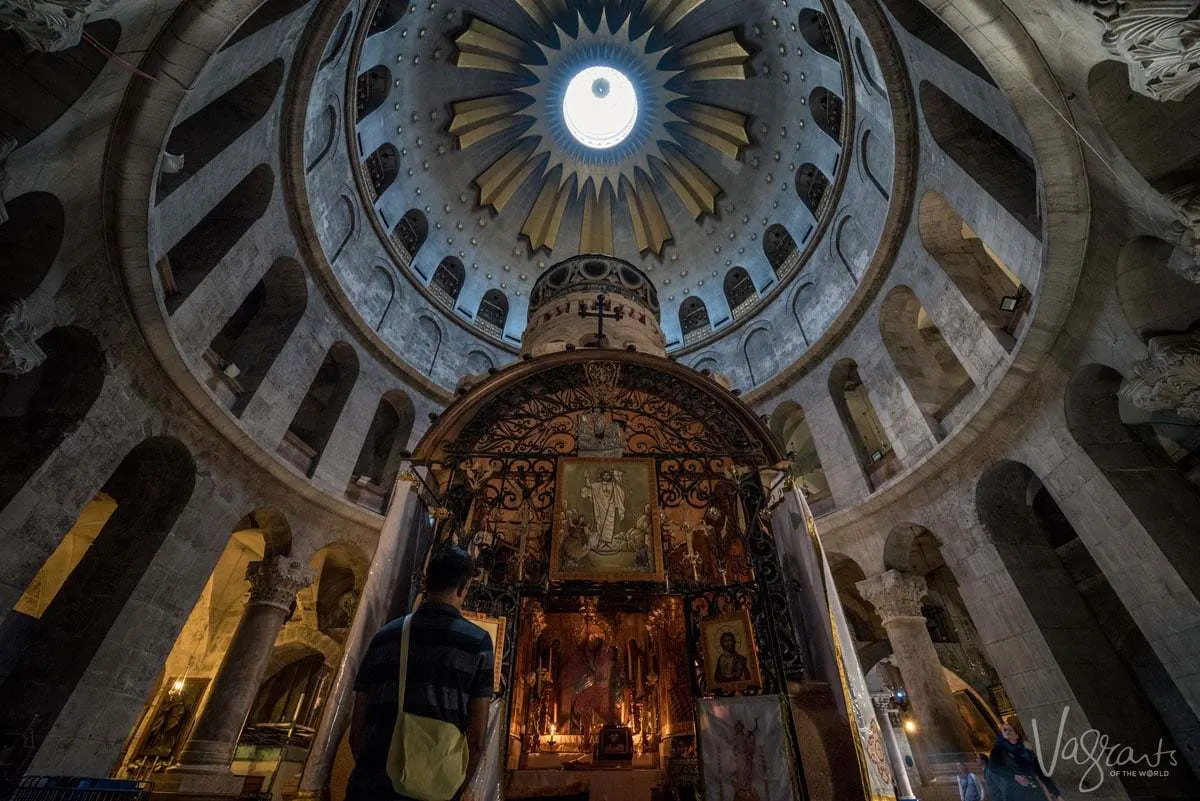
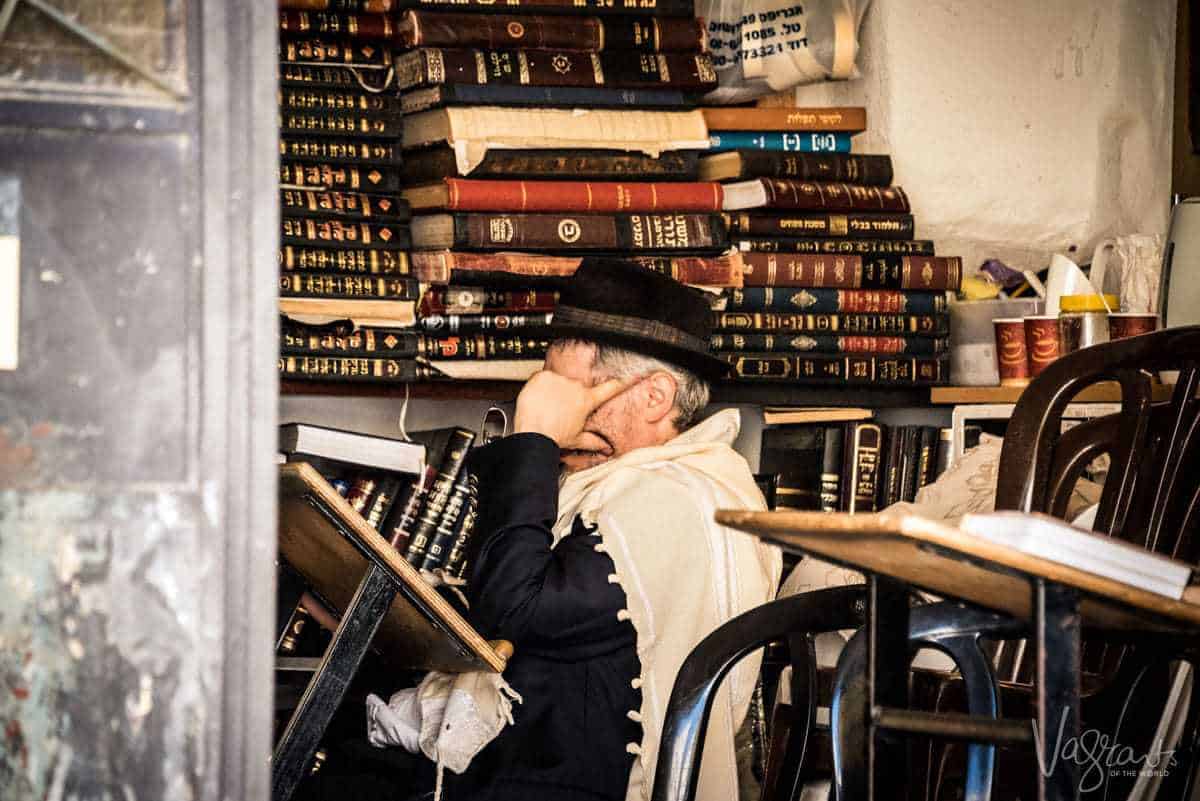
Interior Photography
In contrast to the bright exteriors, you will encounter in Old City Jerusalem; you will also come up against many dark interiors. In many places, it will be difficult, if not forbidden to use a tripod so you may have to think of ways to work around this to get sharp interior shots without camera shake.
Use Your ISO
If you have a camera with high ISO capabilities, this will help to get the extra light you need without needing extra stabilisation. Also, if your camera or lens has stabilisation settings, check these are turned on.
Just remember, the higher you bump your ISO, the more noise or grain you will introduce to your image. This is why I try not to push the ISO too high. If you are not comfortable manually setting your ISO or don’t have time to play around, this is a good time to have your ISO set to auto. However, check if you can cap the maximum ISO setting, so your camera doesn’t automatically push it all the way to its maximum.
This is something you might like to play around with before leaving. Work out the maximum ISO setting on your camera in relation to the amount of noise or grain you are comfortable with and then cap it at that.
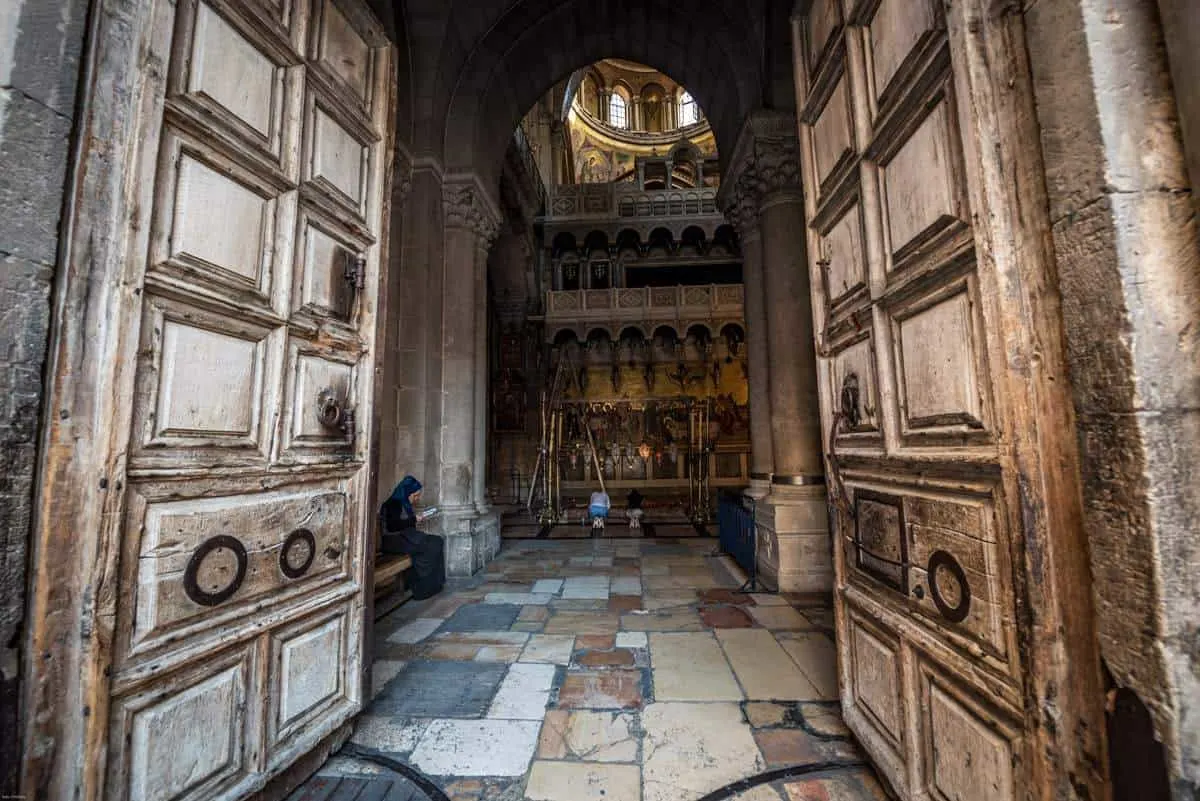
Wide Angle Lens
In low light situations like the image above, I will try to opt for my 14 – 24mm wide-angle lens. A wide-angle lens with a wide aperture such as f/2.8 will allow much more light in creating a faster shutter speed which, in turn, means less chance of camera shake. A wide-angle lens will also help you capture more of the room.
Use Aperture Mode
While I would mostly shoot in manual mode, I find switching to Aperture mode is very forgiving in situations like this, especially for travel photography. You don’t always have loads of time with travel photography to play with settings.
For those of you who shoot in auto, you will know, it is times like this when your camera will automatically deploy the flash. This doesn’t always make for a great scene and may not be allowed in certain buildings.
Aperture mode, set to the camera’s lowest number (widest aperture opening) will allow maximum light in and automatically adjust your shutter and ISO accordingly. You may still have to bump your exposure up a bit or tweak your shutter speed, but it gives you a great starting point for getting the best low light shot possible without too much fuss.
TIP: Aperture and shutter priority modes are excellent starting points for those looking to get out of auto mode.

Stabilisation
While a tripod may not be possible in many of the interiors or darker settings of the Old City, there are other ways to stabilise your camera.
- Find a wall or pole to lean against and brace your arms by pulling your elbows into your side. Make sure you breathe in and hold it as you press the shutter. This can often give you enough stabilisation in low light situations.
- Take a smaller tripod with you. We find the Joby Gorilla Pods are brilliant for this type of photography. You can bend them to work with what you have. Bend it over a railing or even just stand it against the front of your legs. These are a great alternative to a full tripod. They also come in every size to suit smartphones through to full frame DSLR’s.
- If you are using a smartphone, you may still want stabilisation on these darker shots or if you are using HDR functionality. My new favourite toy is the handheld extendable tripod with Blue Tooth remote for my iPhone. You can set up the shot on your phone, set the timer or use the remote to take the shot, then just fold it away into your handbag. It can also be used as a selfie stick if you’re that way inclined.
Beat The Crowds
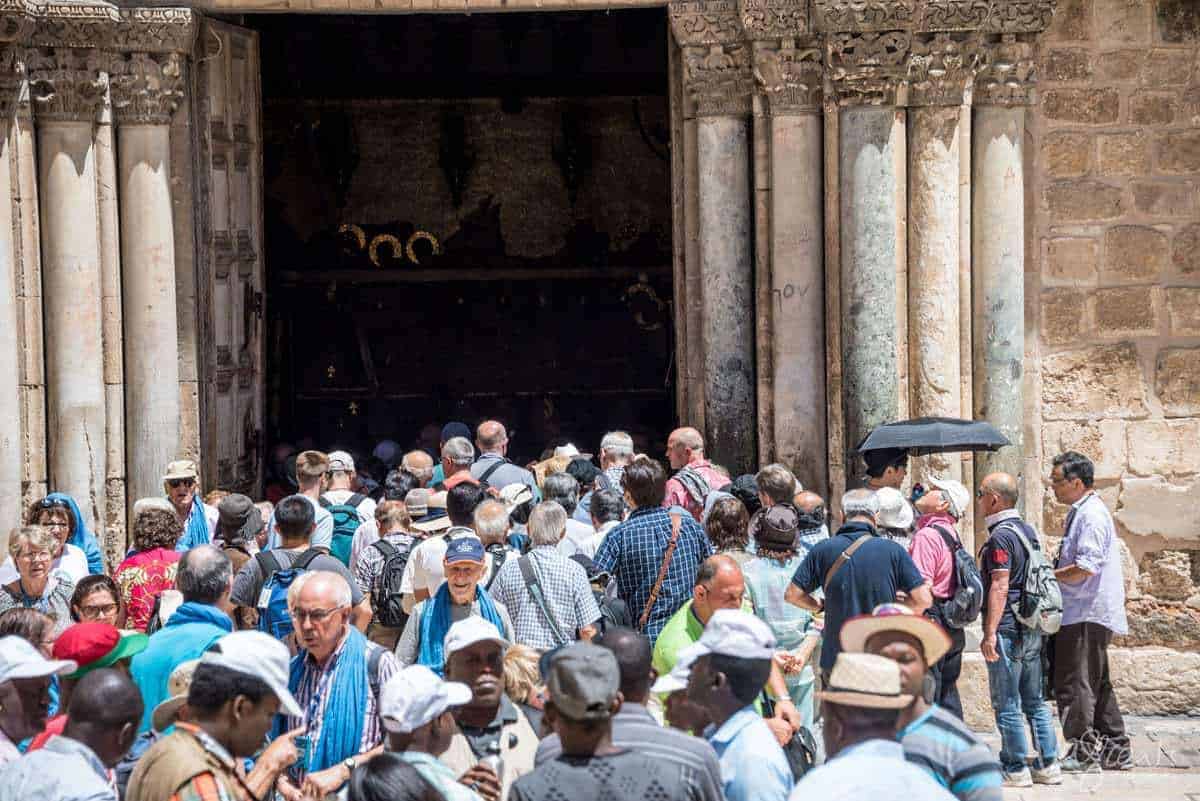
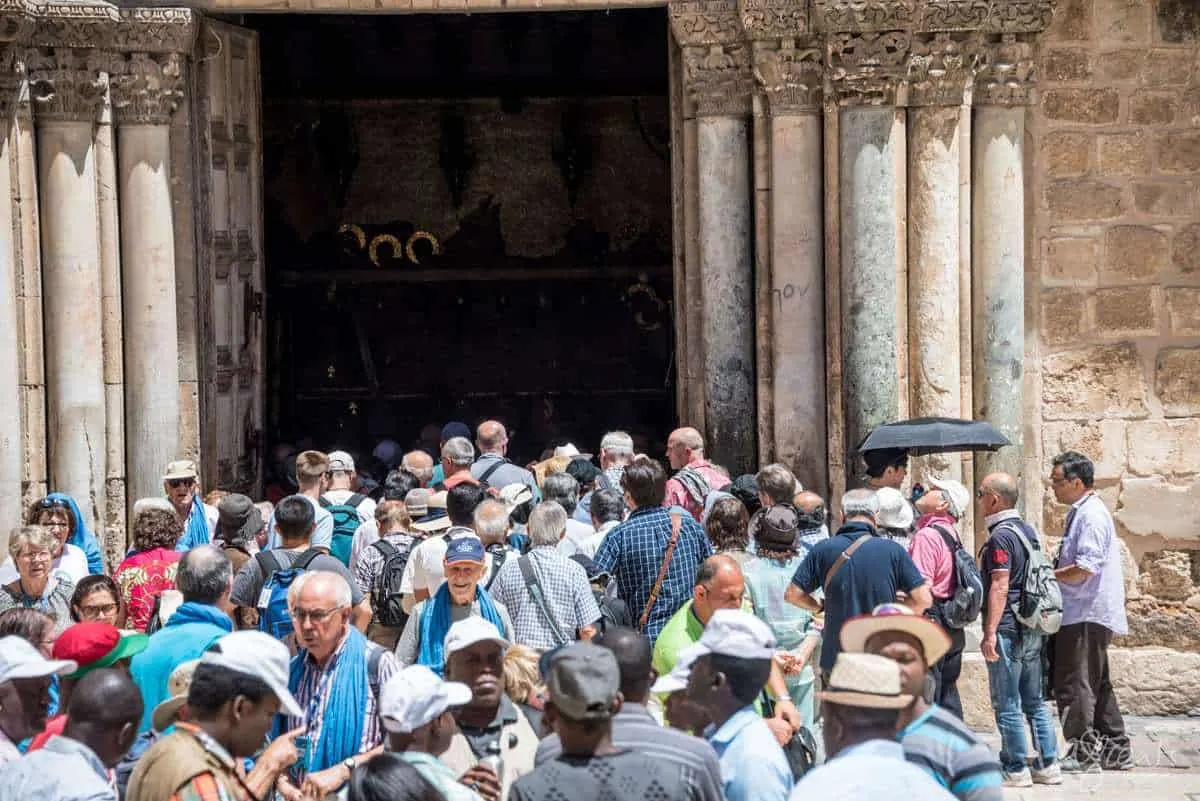
It goes without saying, another reason to start early and finish late is to avoid crowds. Old City Jerusalem is without a doubt, a bustling place. We started at 05.30 one morning and still only had a small amount of time before tour and pilgrimage groups started moving through.
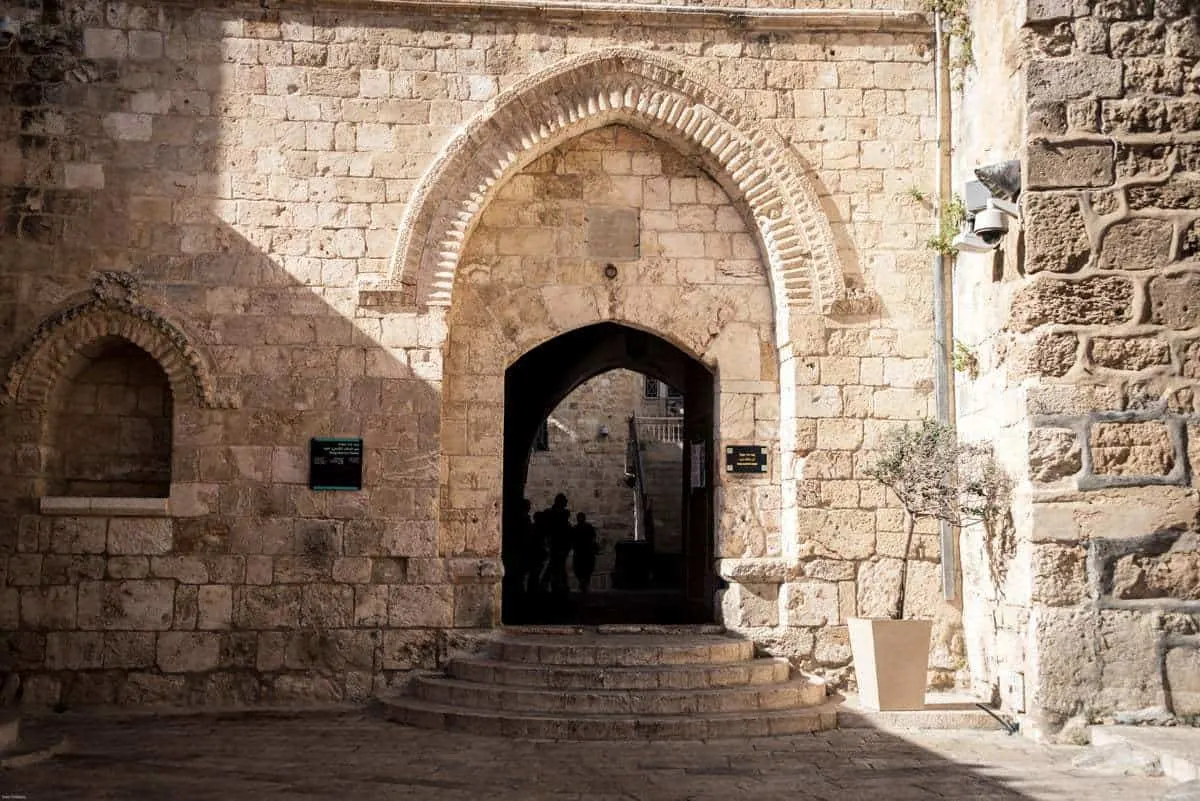
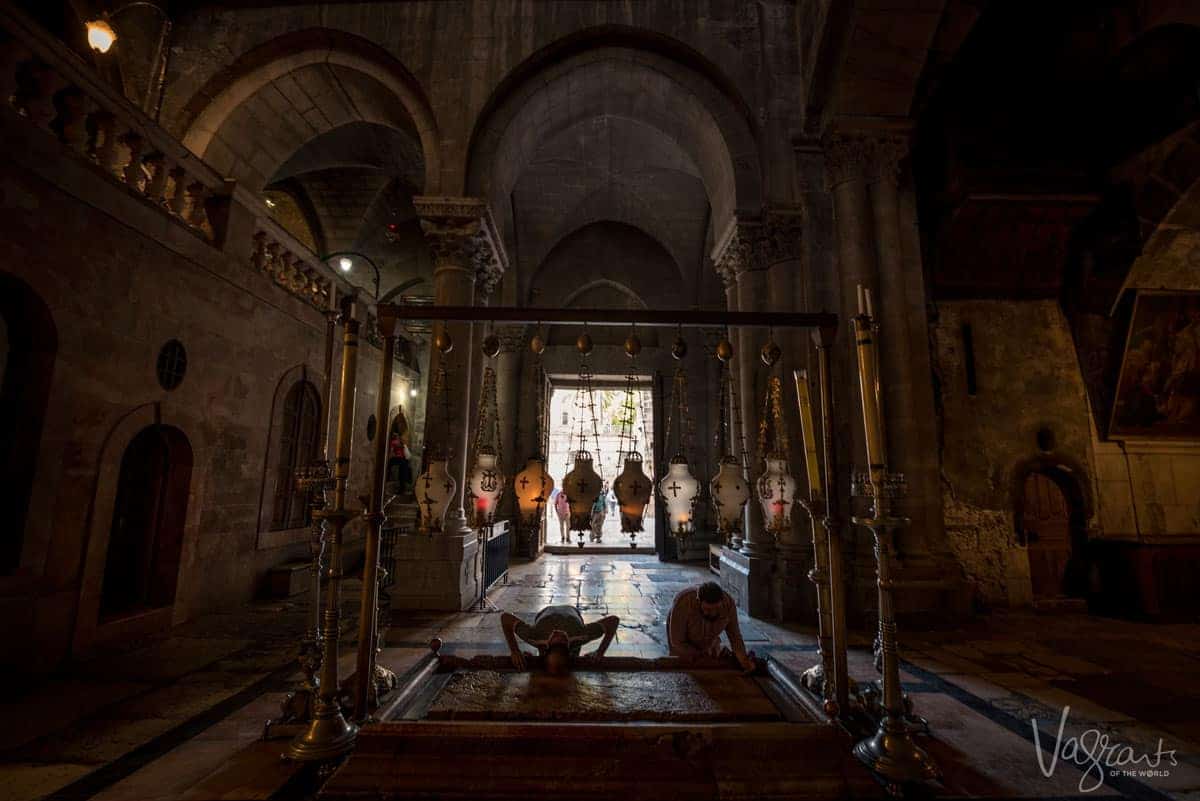
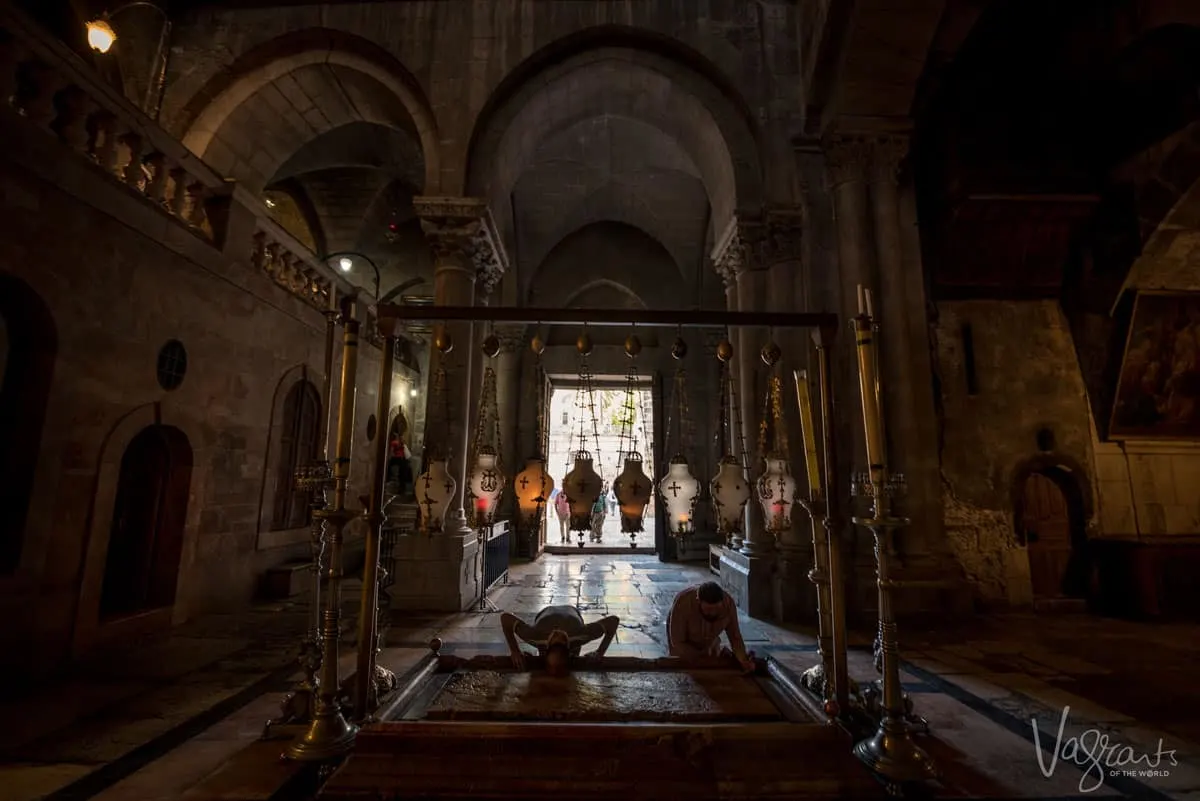
We highly recommend making an effort to get up early at least one morning. You will be rewarded with empty streets, locals on their way to early morning prayer and places like the Church of the Holy Sepulchre almost to yourself. Below is an example of the difference getting up early can make.
The first photo was taken at around 06.30 in the morning. The second was taken, of the same spot at 10.30 am the same day. Needless to say, we didn’t even bother to try to go in the second time.

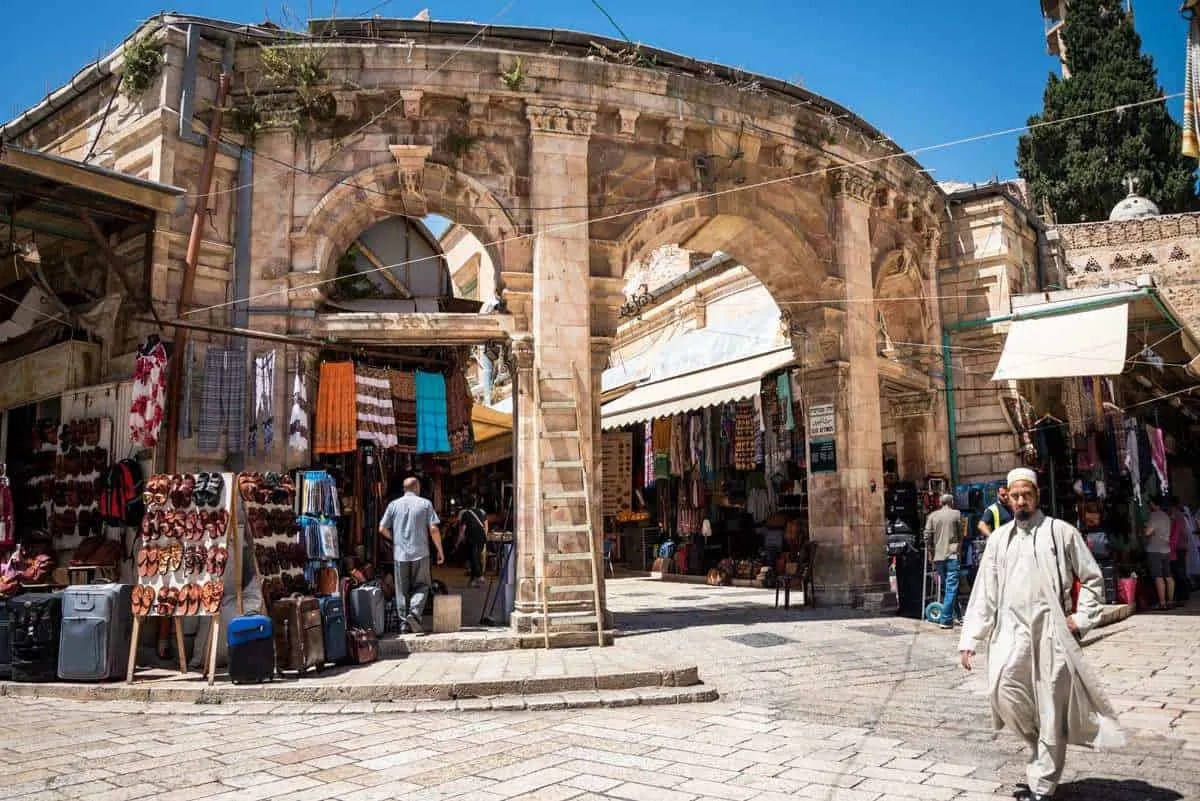
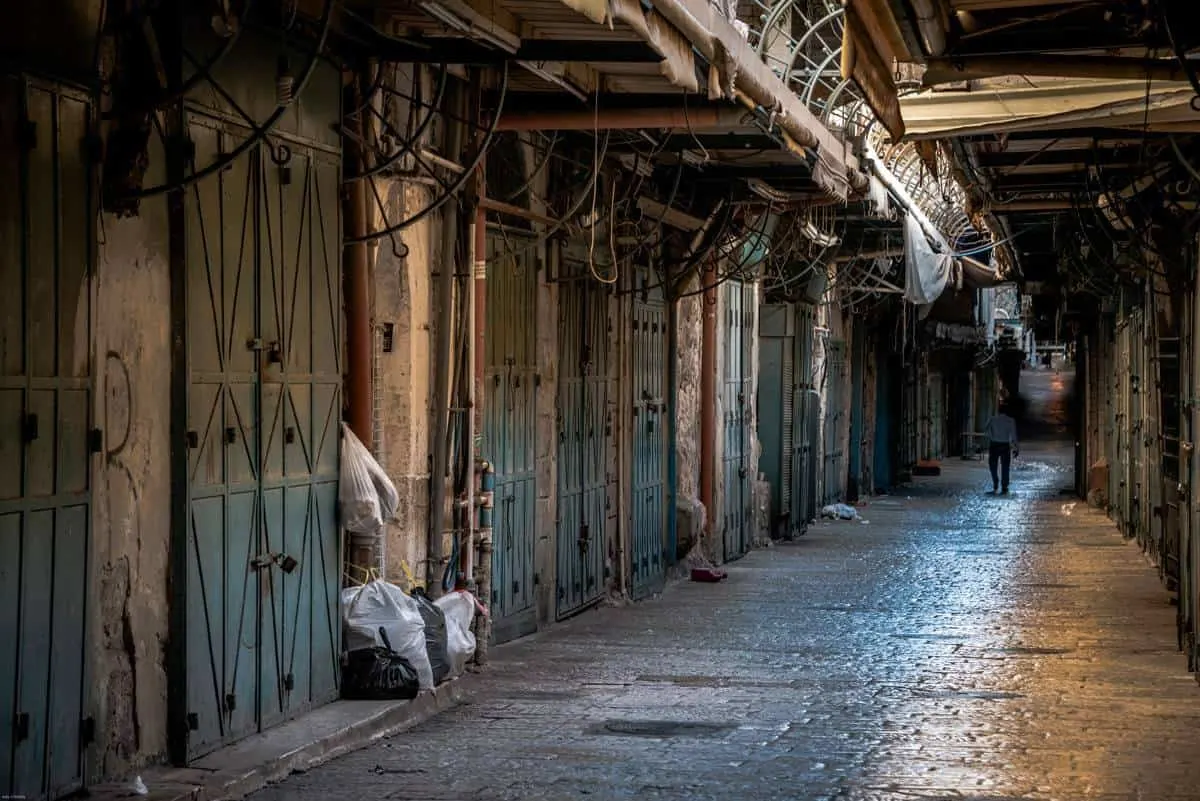
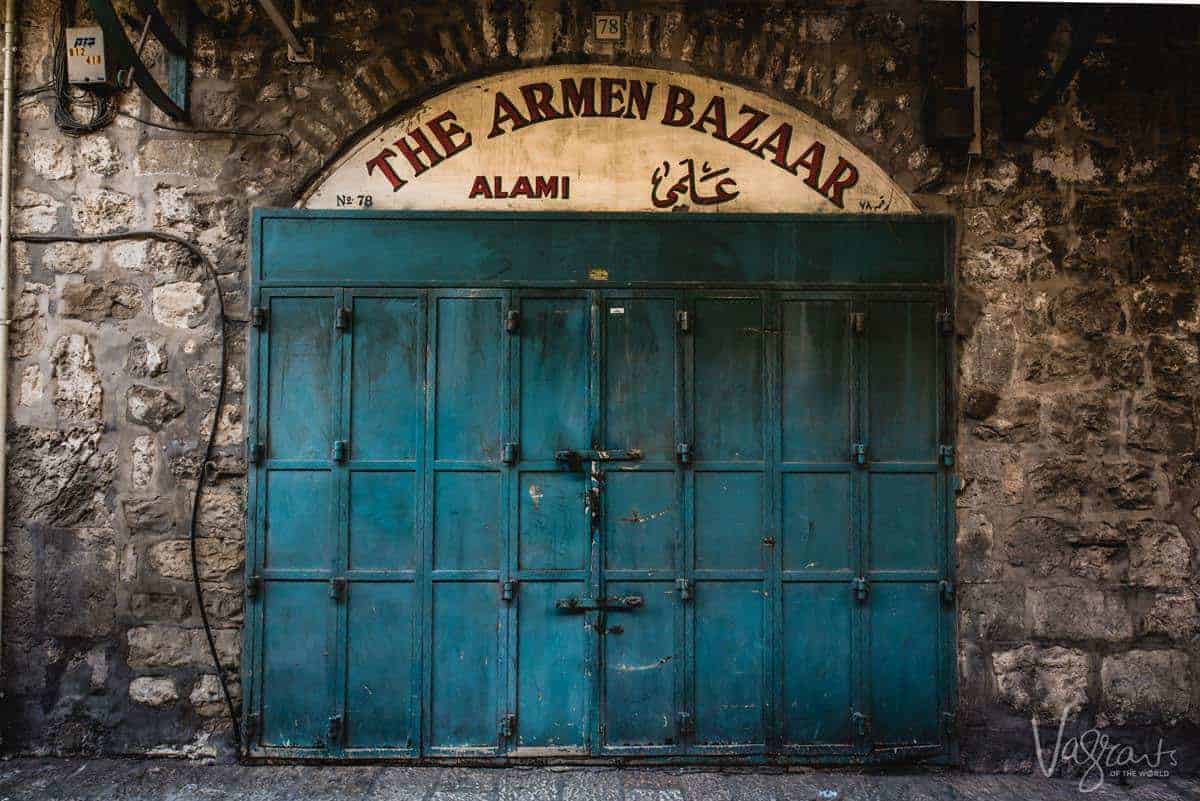
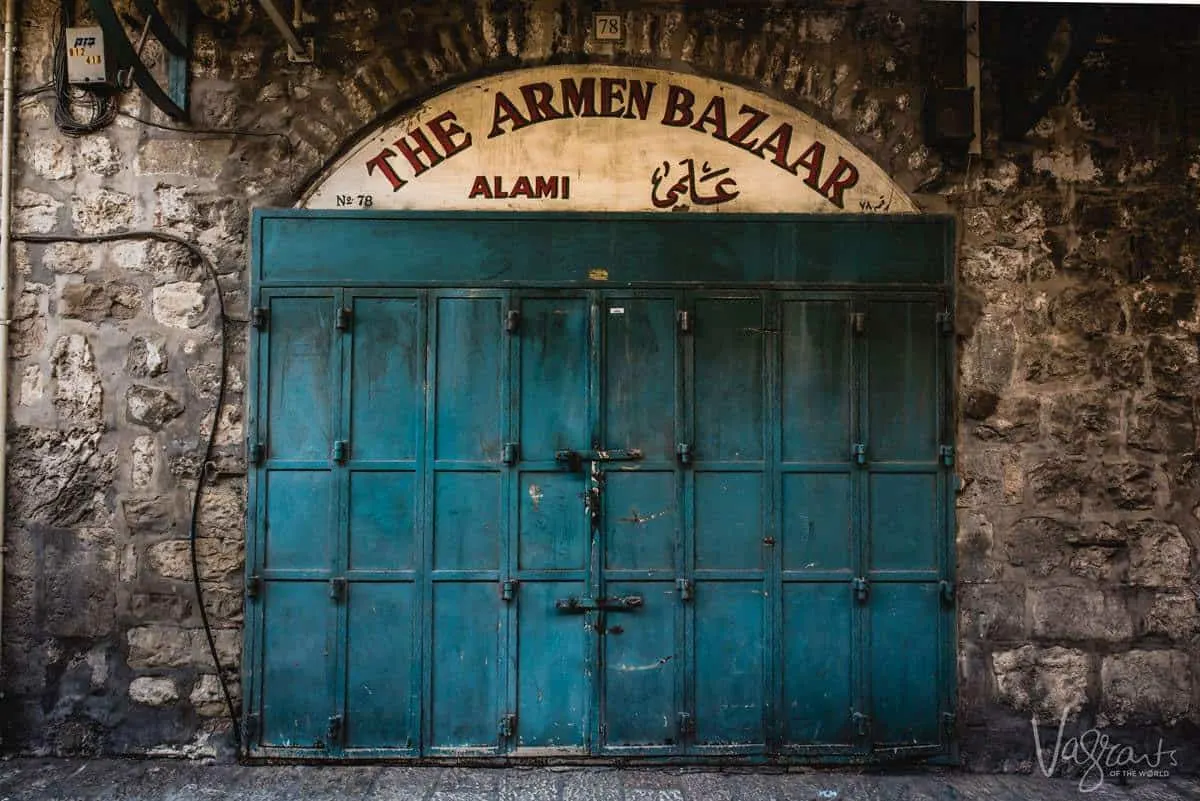
It is also nice to see the narrow alleyways quiet before the shops have opened. You can stroll unencumbered by the crowds and shopkeepers spruiking their wares. Later in the morning, this shop would be unrecognisable with souvenirs and clothing hanging from every available space.
Don’t get us wrong, the utter chaos in some of the market streets is very much part of the atmosphere and presents fantastic photographic opportunities. But to see the contrast of quiet is also a great alternate view of Old City Jerusalem.
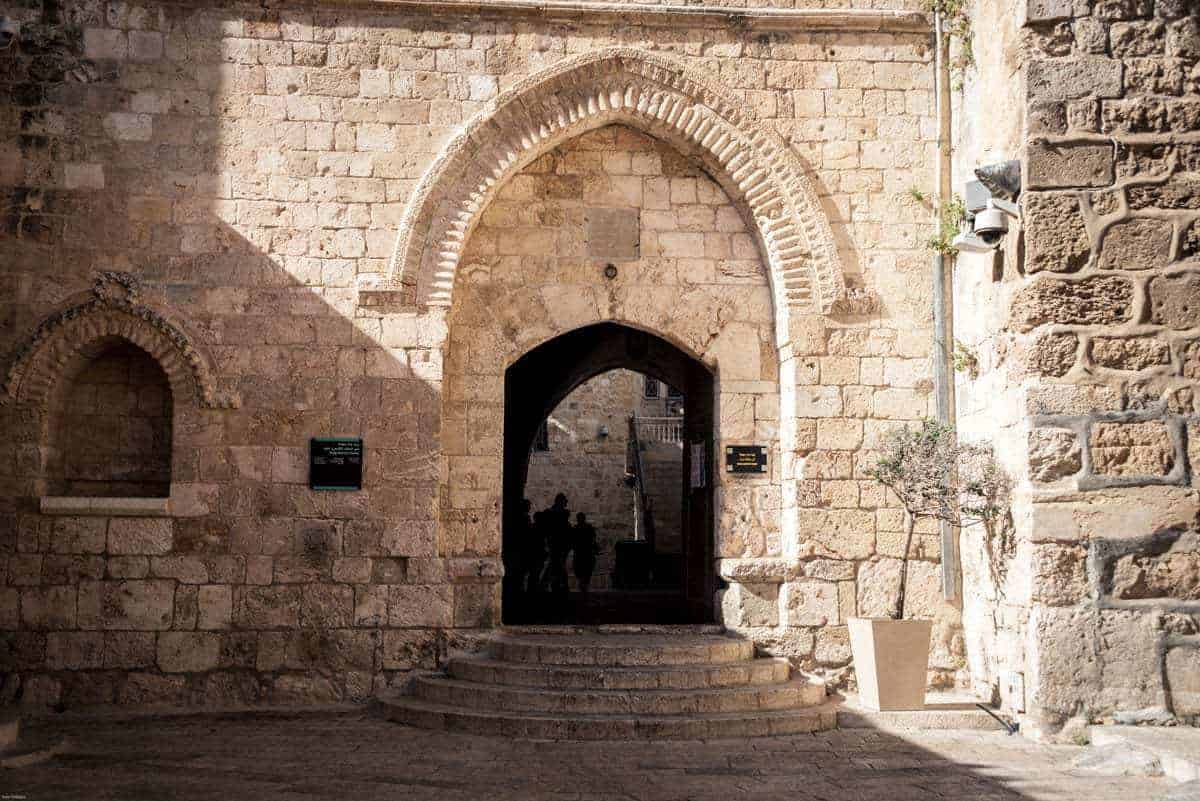
Change Your Angle and Re-Compose
If you can’t beat the crowds, but you still want to create a sense of quiet, consider composition. Move around to see if you can use structures or a different angle to block crowds. Simple changes to your composition and a little patience can change the look and volume of people in your shots.
Another good way is to aim high. Get down as low as possible and point your camera or smartphone upwards at an angle. Ensure the bottom of the frame is angled just above the heads in the crowd. You will be surprised at how many people you can block from an image while also getting new and interesting angles.

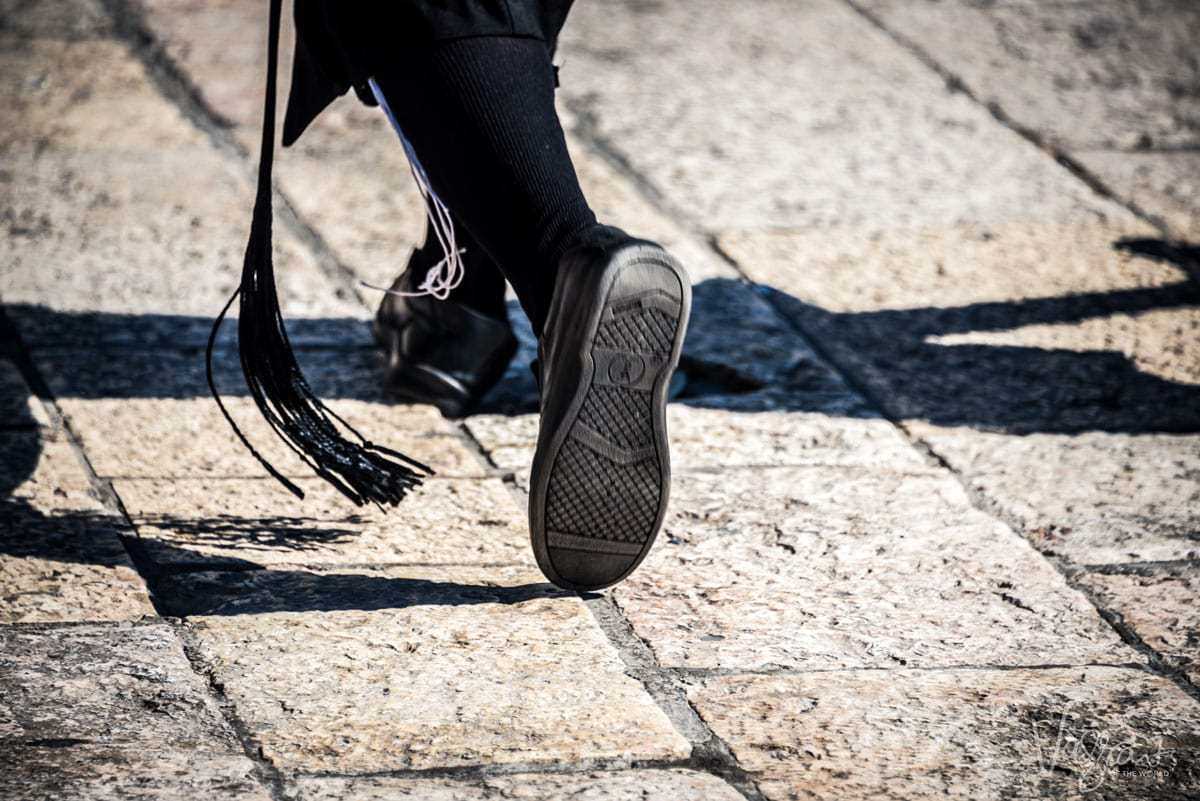
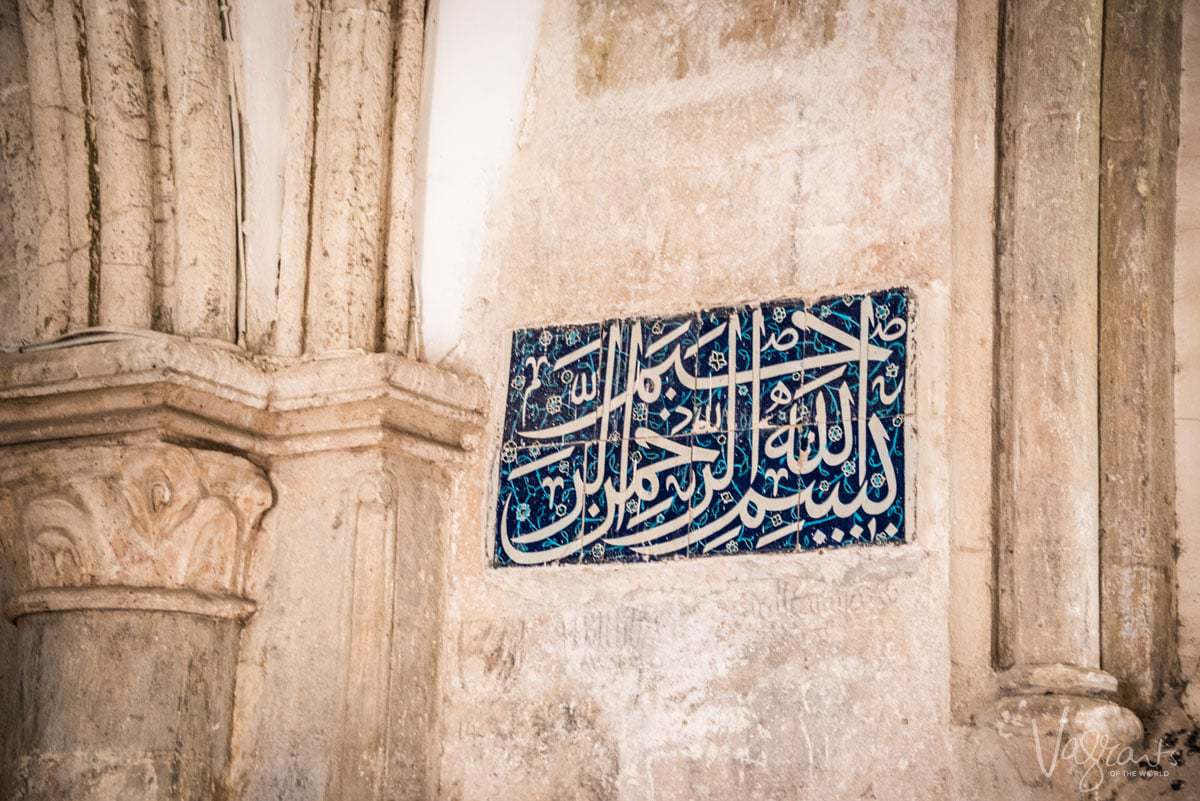
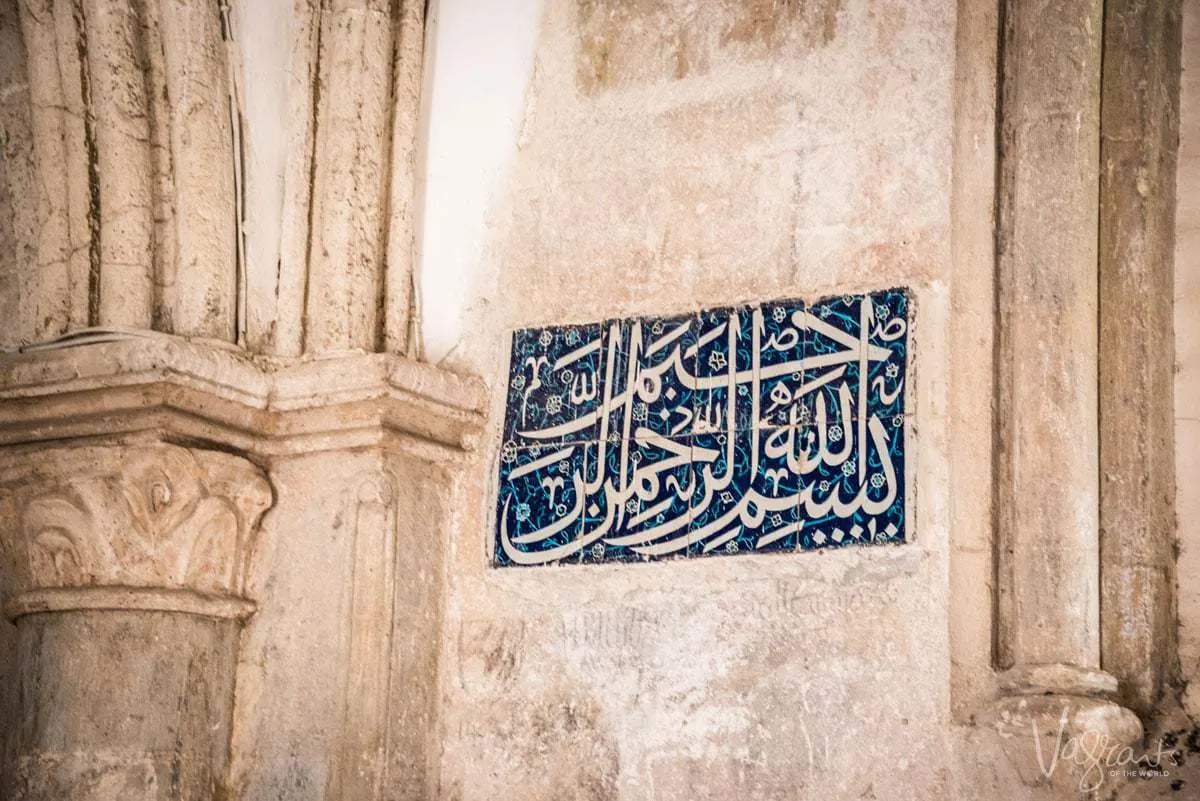
Zoom In On The Details
The smaller details can tell us volumes about a place. Exploit the many intricate details around the city instead of always looking at the wider scene. You will still capture the essence of the Old City without the crowds.
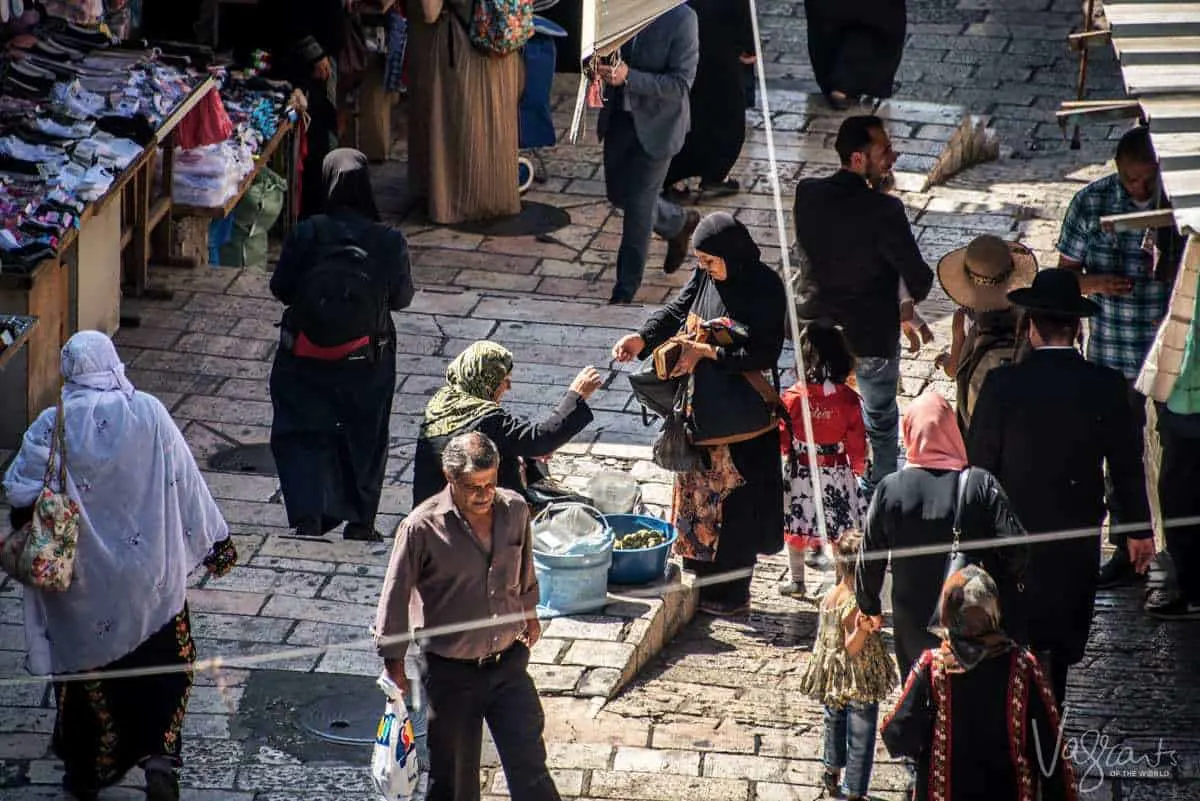
Work The Crowd
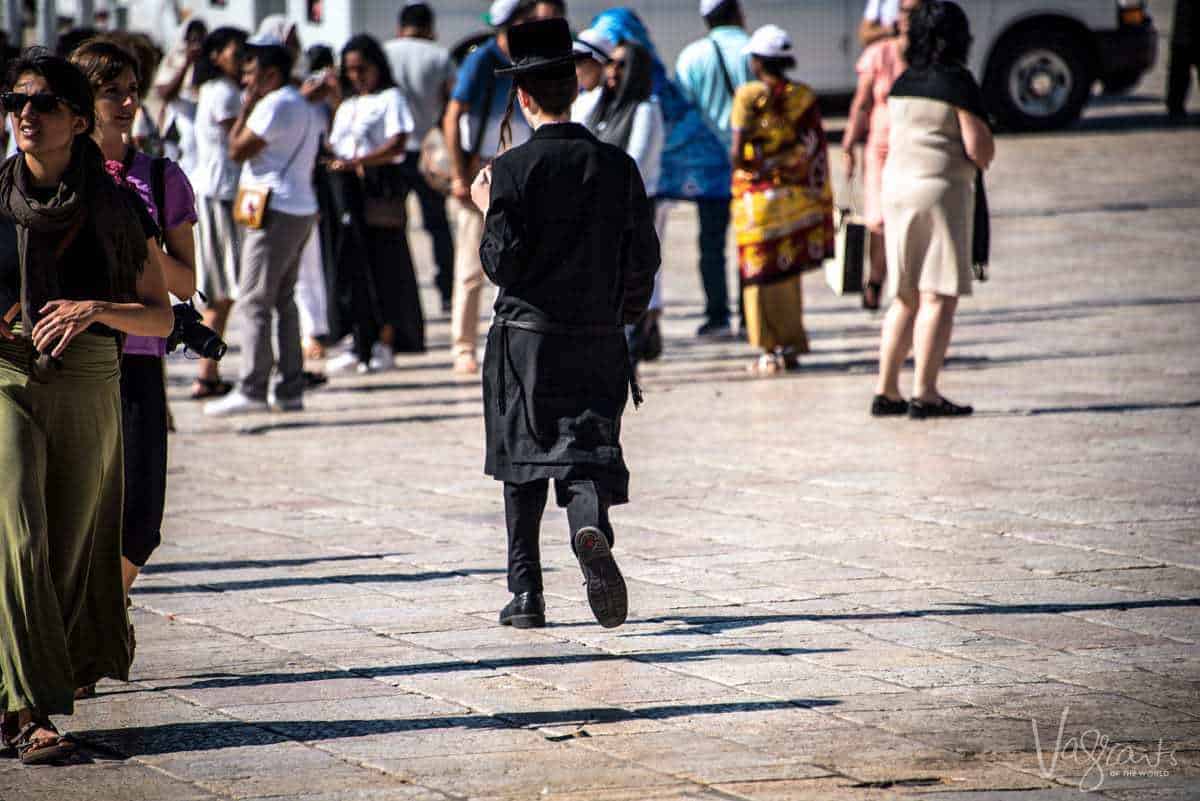
While the crowds in Old City Jerusalem can be chaotic, the people who live here are an inseparable part of the scene. Old City Jerusalem has such an interesting human element it is a pleasure to photograph the constant comings and goings.

Zoom In
I find photographing people a difficult one. Some people are very upfront about it and some, just downright rude.
Unlike what we experienced in Morocco where people did not like having their photo taken, cameras are so common around the religious and archaeological sites of the Old City; people just assume they could have their picture taken. So, all in all, people seem pretty relaxed about photography. However, I still believe in sensitivity and common courtesy.
The zoom lens is your friend in places like Jerusalem. I often find images taken from a distance with a zoom lens or zoom functionality can result in great candid moments that give a sense of atmosphere.
If you do want to get a close-up and it will be obvious you are photographing a person, be courteous and ask for permission. It’s just good manners. Sometimes a simple smile will suffice or point at your camera and wait for a response.
Regardless of your approach, always remember to be respectful.

We use a 28mm – 300mm lens for travel. It is the perfect lightweight compromise to a cumbersome zoom lens. Using a zoom for people photography means you don’t have to get in people’s faces. It is also helpful when you are not allowed to enter an area but allowed to photograph it from afar, such as areas of the Western Wall. More on that later.
Find Out More About The Best Camera Lenses for Travel Photography

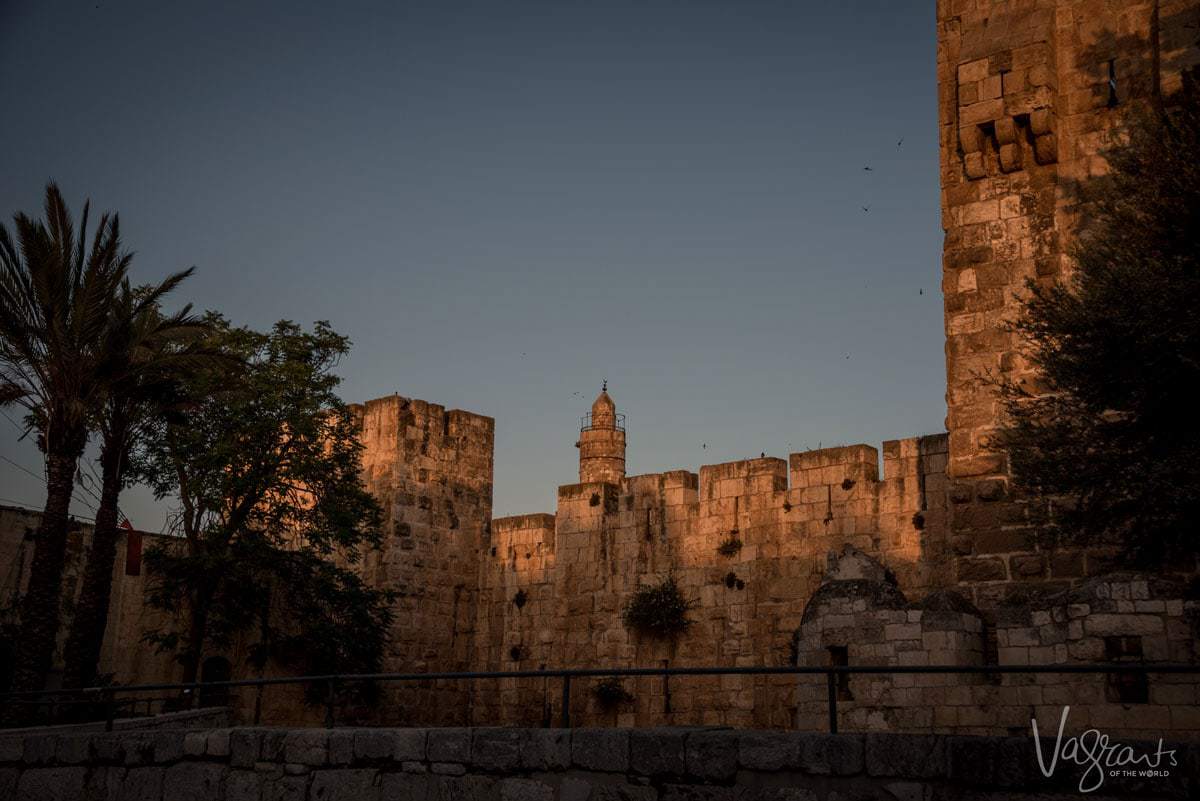
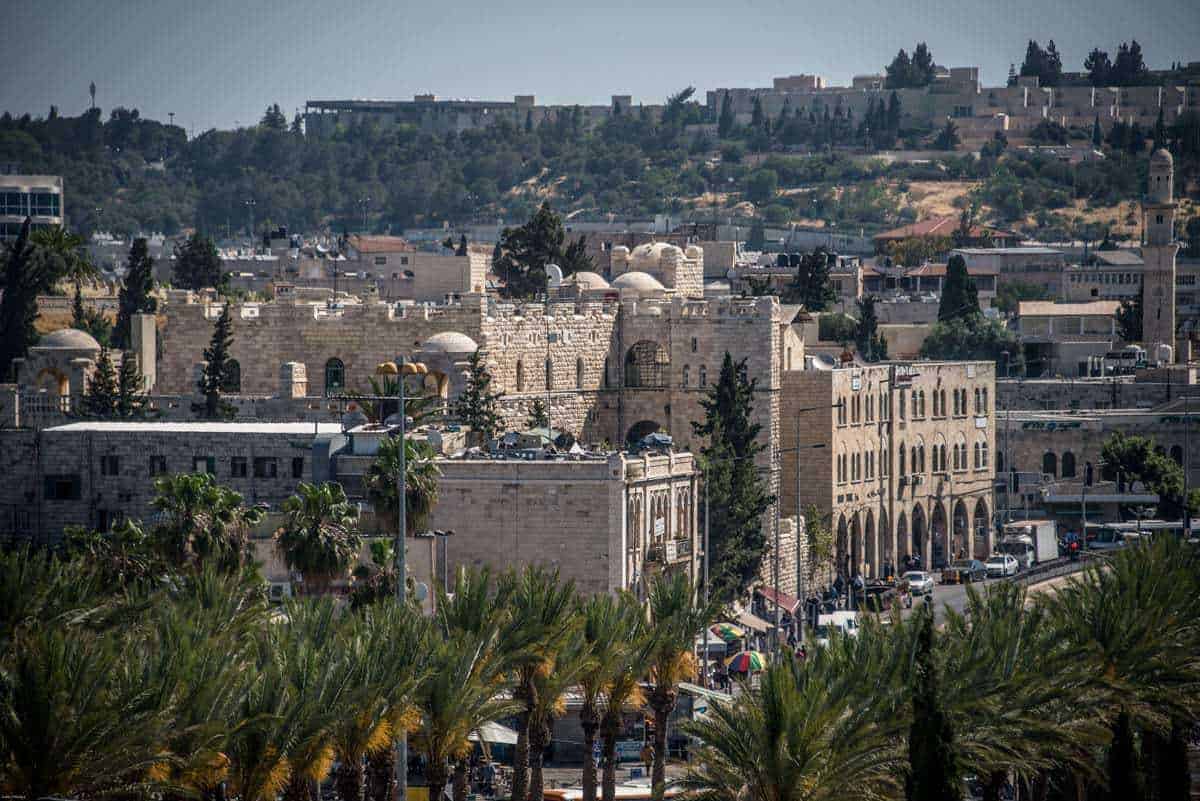
Walk The Wall
Take a walk around the old city ramparts from the Jaffa to Damascus gates for a different view of Jerusalem. We have to admit; this was not the most interesting or scenic rampart walk we have done. It was certainly not a patch on walking the walls of Dubrovnik, but worth the small fee.
You can get some lovely views of the city of Jerusalem outside the walled city. There are also a few good elevated views of life within the walls of Old City Jerusalem.
If you want to walk the ramparts, tickets can be purchased at the ticket office next to the information centre at Jaffa Gate.
The ramparts are only open between 9 am-4 pm. During the summer months, the southern side is open until 7 pm and the north side until 5 pm.
Cost is 16 Shekels (~$4.50 USD) for a day pass.

Western Wall
Surrounding the Temple Mount is a retaining wall built when the Second Temple was constructed 2000 years ago. This section of wall is known as the Western Wall or Kotel. It is considered by the Jewish faith the holiest site for prayer given its proximity to the original temple and the gates of heaven. It is also a very popular spot for photographers.
Rules on Photography at the Western Wall
You will find most places allow photography within the Old City without any restriction and we never had any issues photographing at the Western Wall. However, there are some exceptions. Orthodox Jews request you don’t take pictures at the Western Wall on Shabbat; Friday night until Saturday night.
Some people will still take photos from afar during Shabbat, but as we mentioned earlier, regardless of any acceptance of photography, we must remain respectful. The Western Wall is a holy site of great importance to many people as should be respected as such.
The Wall is divided into two sections separating men and women. The largest area to the left is for men only. Visitors of all religions are welcome to pray at the wall at any time but are asked to observe certain modesty requirements. Men must have a head covering or take one of the free head coverings available at the entrance. Likewise, the women may borrow shawls to cover legs or shoulders.
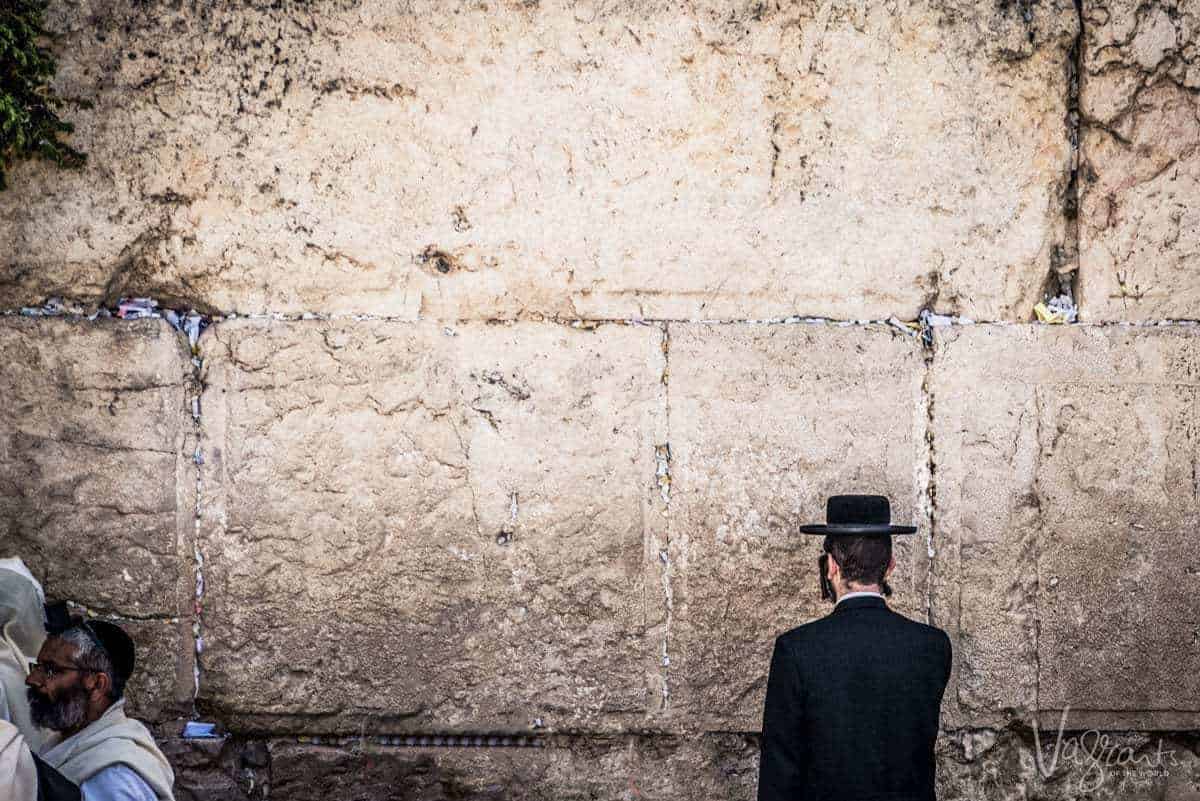
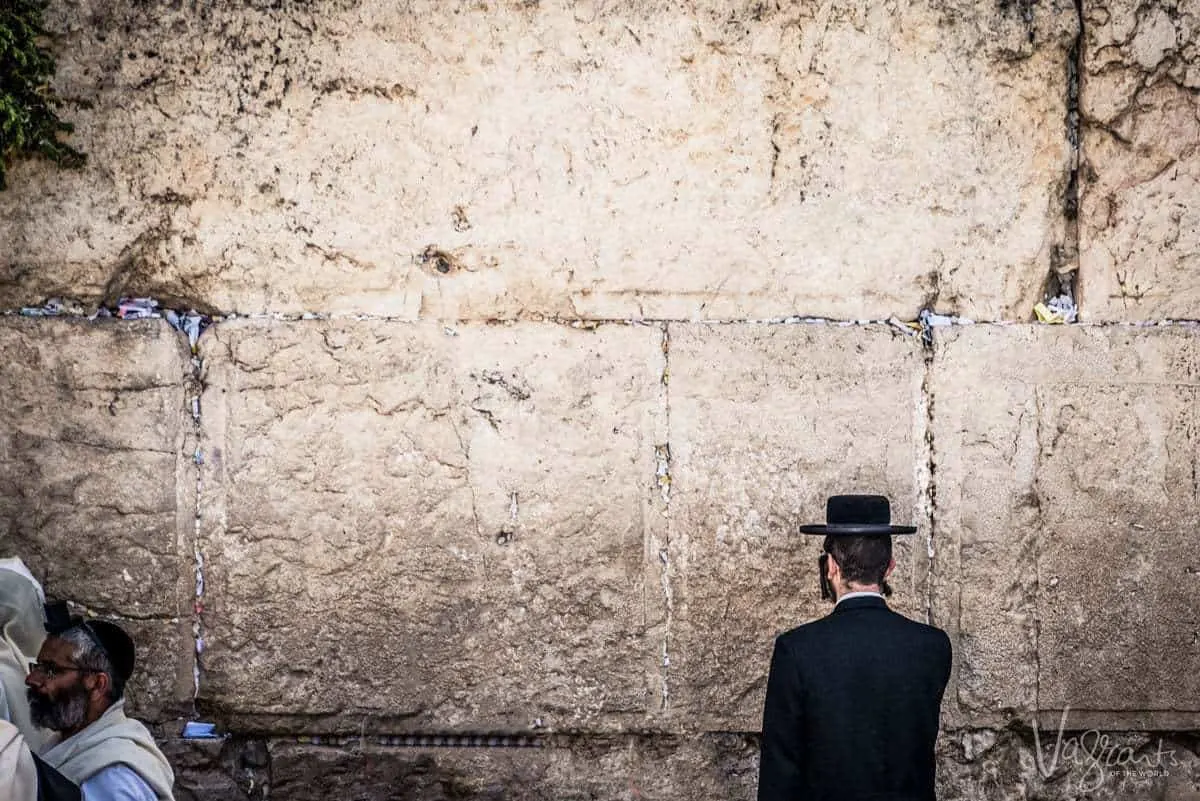
Even at the Wall, time of day can offer different opportunities for photos you may not achieve in the middle of the day. The Wall is open 24 hrs a day, every day so take advantage of it.
Early morning at the Wall is a very good time of day as there are very few tourists around. This gives you ample time to get some shots uncomplicated by crowds.
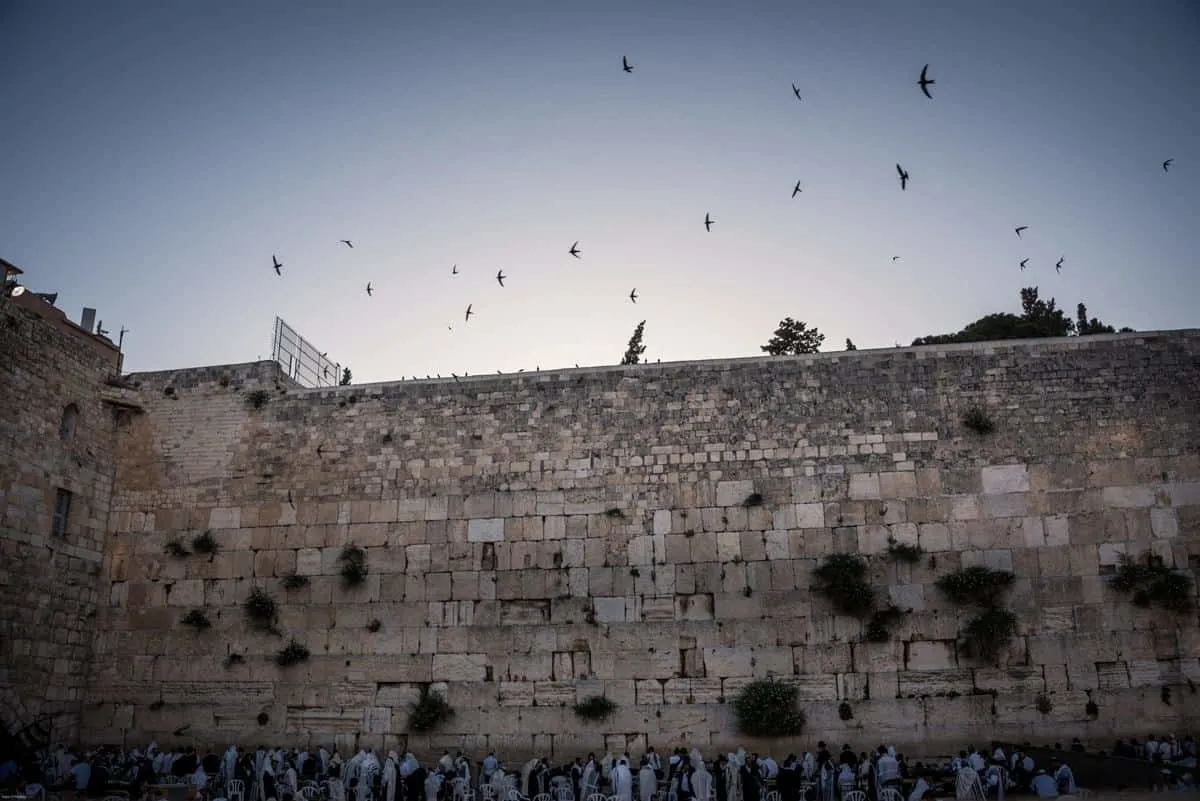
Because of the large open area of stone, the area of the Western Wall is very bright during the middle of the day. As an alternative, dusk creates lovely soft lighting. The early evening also attracts large flocks of birds for some reason which gives another perspective to the scene.
Again, think about your composition. Moving away from the close-up and angling your camera slightly upwards gives us more perspective on the size of the Western Wall and a better sense of space.

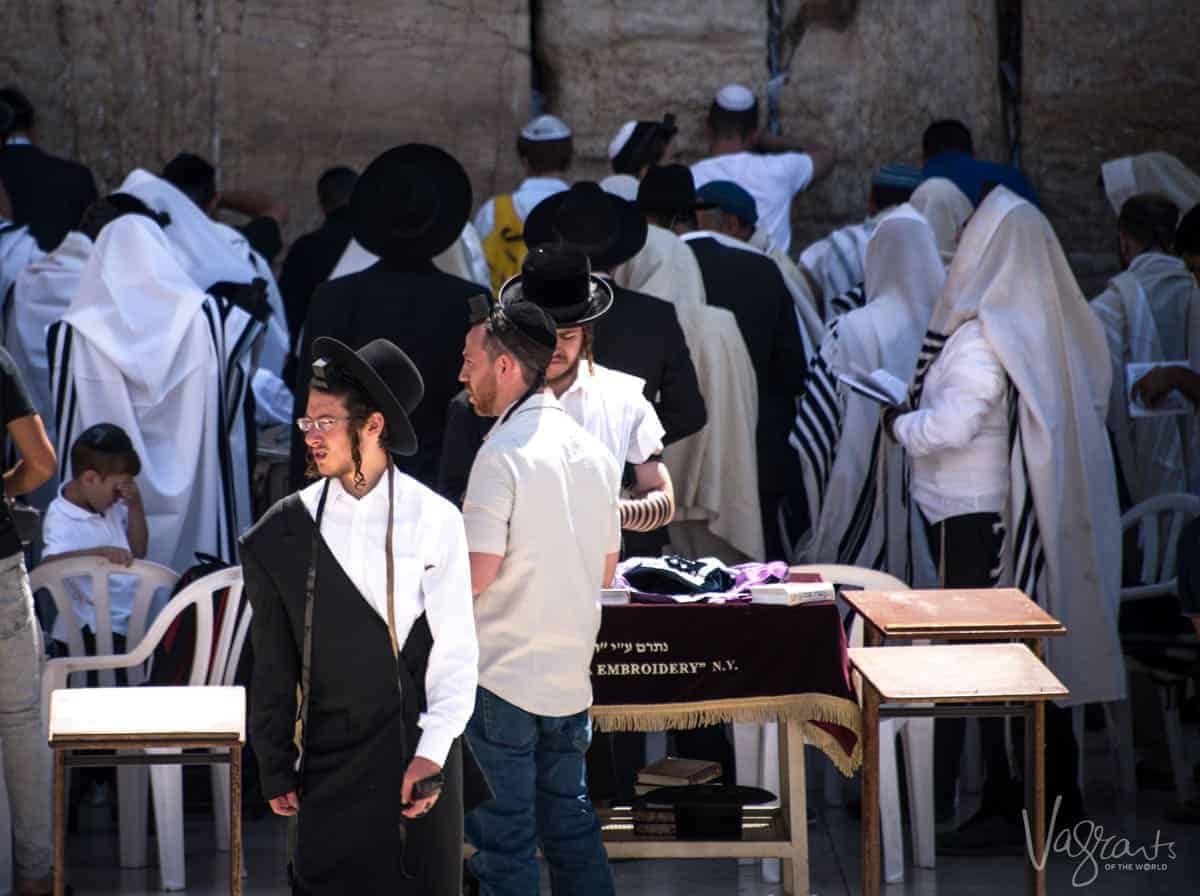
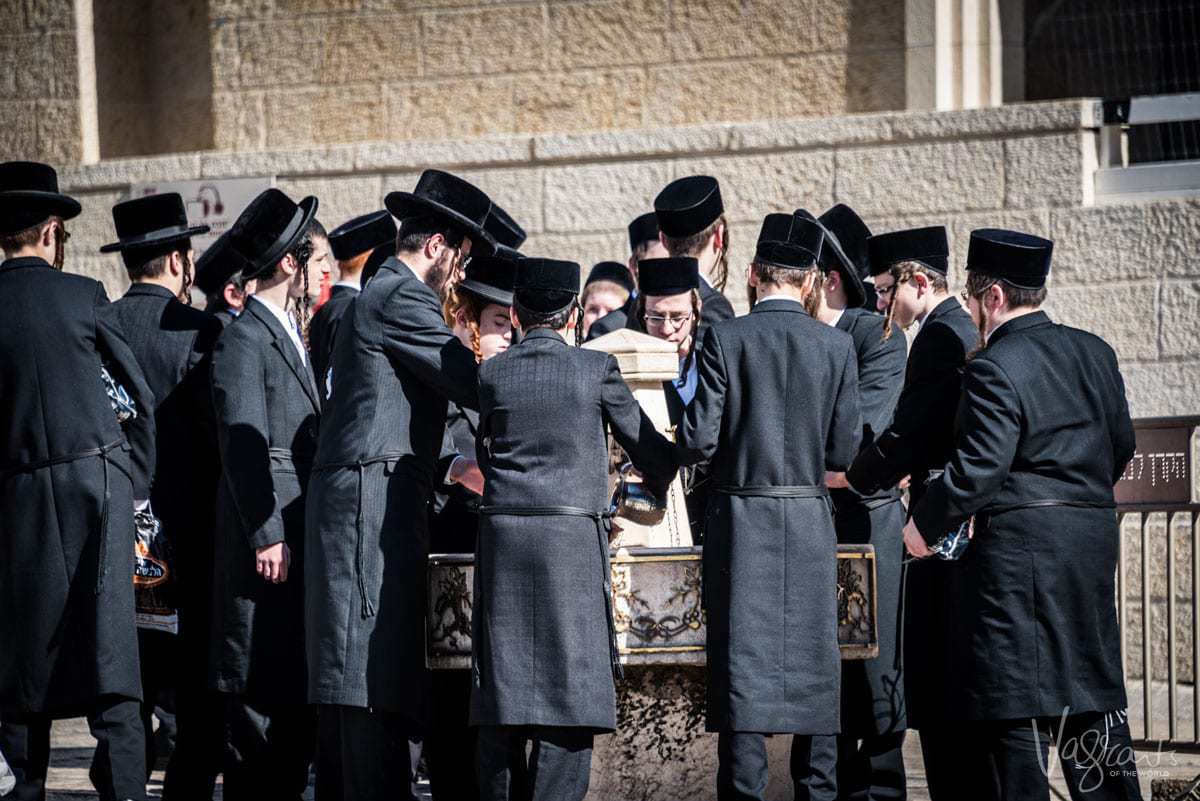
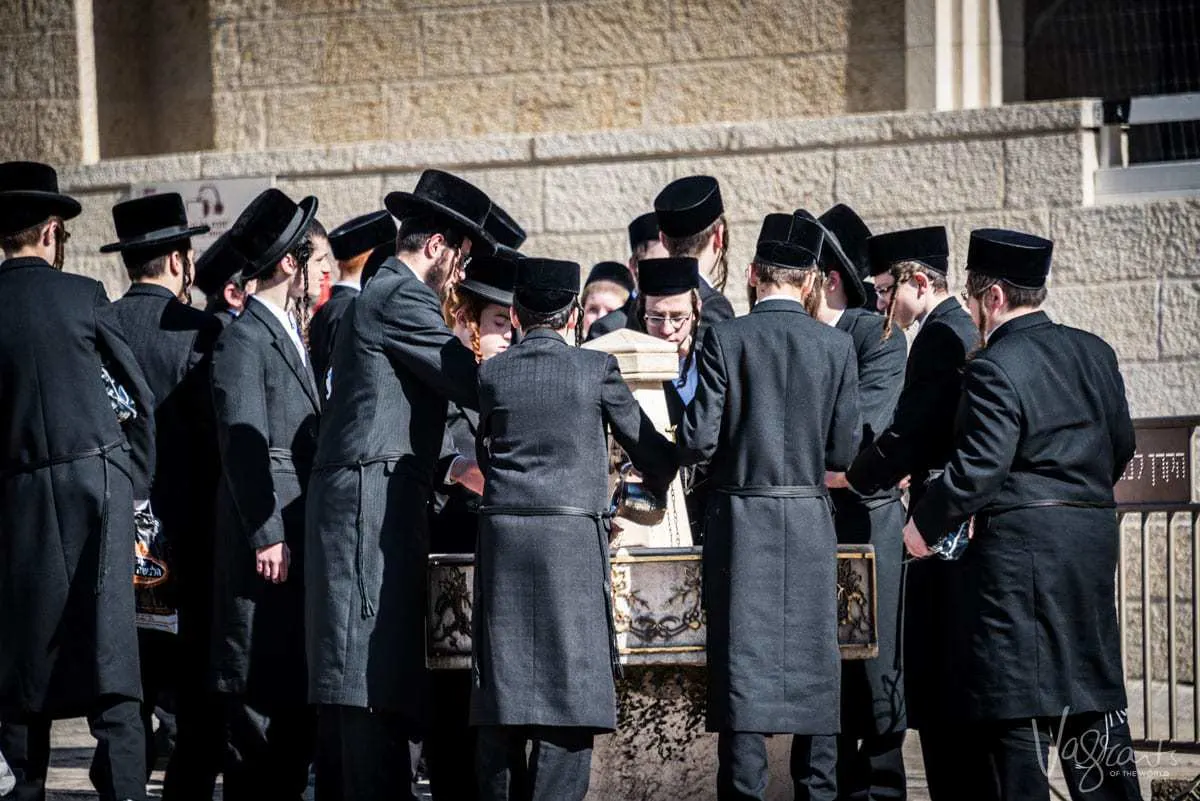
Bar Mitzvah ceremonies are held at the Wall usually on Mondays and Thursdays. These celebrations draw big crowds which create a fantastic atmosphere with so many great photographic opportunities.
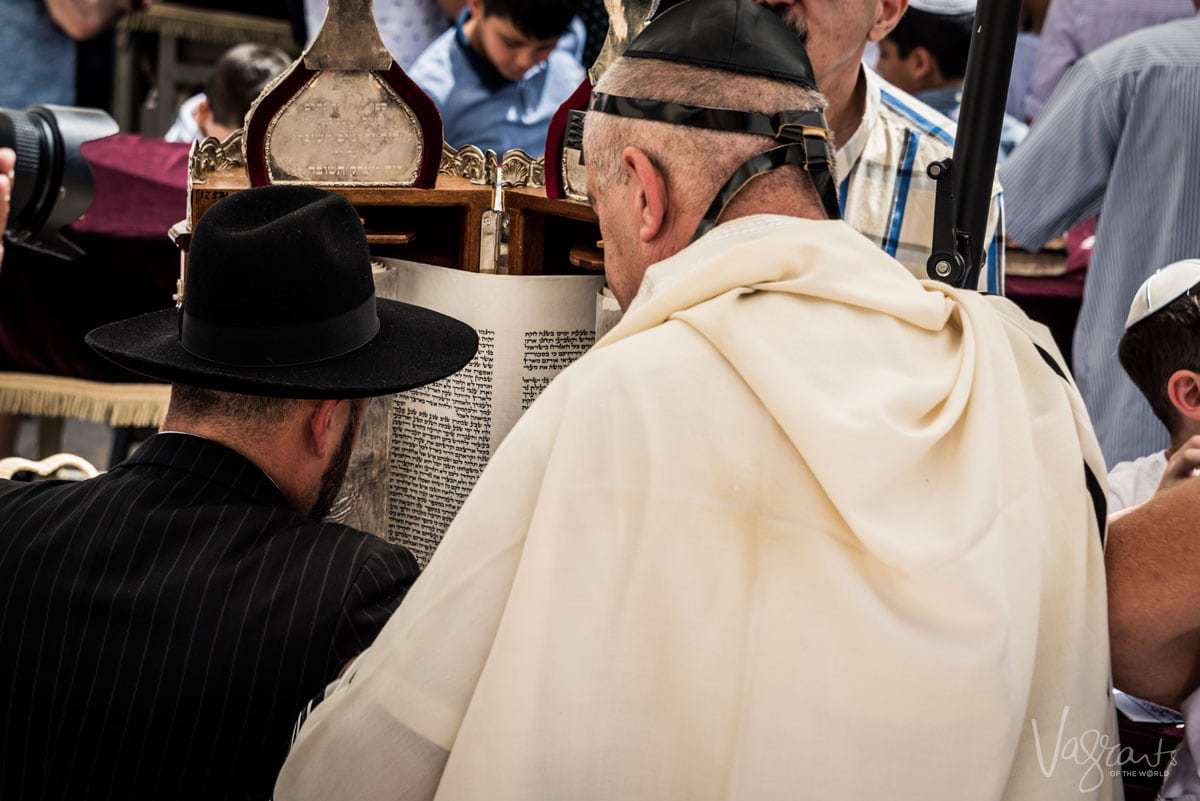

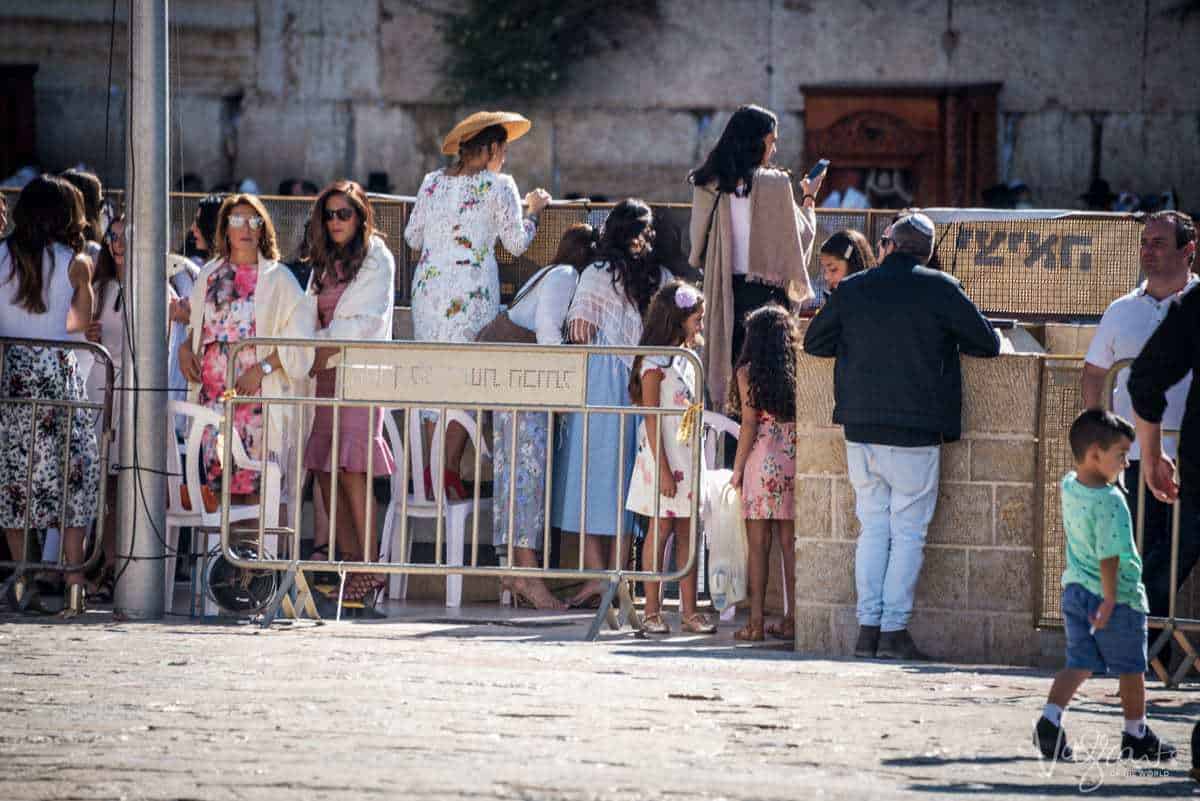
We talked before about being able to photograph an area you are not allowed to enter. As women are not allowed to enter the men’s side of the wall, and vice versa, this can create some issues. Mark had no problem entering and filming within the men’s only prayer area, but I obviously had to wait outside. Mark also inadvertently entered the women’s area and was promptly kicked out.
Never fear, this is where your trusty zoom or zoom functionality will come into play. On the women’s side of the wall, there is a platform for the ladies to stand on so they can observe the Bar Mitzvah ceremonies over the fence. There are also chairs placed along the facing fence of the men’s side of the wall so the ladies or anyone else for that matter can stand on them and watch proceedings within the men’s area. It is not only convenient but offers an excellent elevated point from which to take photographs.
People seem less inclined to want to peek into the ladies side, probably because the men’s side is where most ceremonies take place.

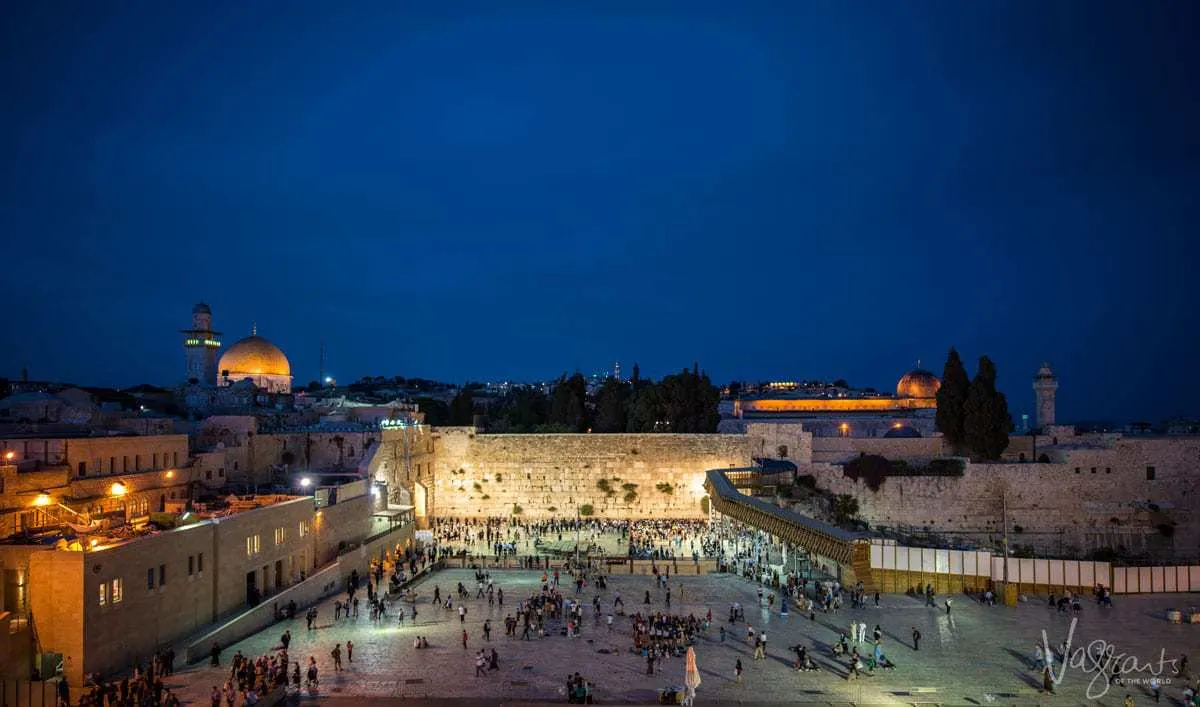
Night Photography
We love photographing cities at night. Like Ghent in Belgium, some cities put on a special show once the sun goes down. Old City Jerusalem is one of those cities.
Most people will be looking to get the iconic shots of the Western Wall and the Dome of the Rock. And why wouldn’t you, it’s beautiful at night.
TIP: When you are in the plaza at the Western Wall, head to the security gate at the top of the stairs directly opposite. To the left of this gate, just above the Colel Chabad Free Kitchen For The Needy is a free viewing area perfectly positioned for a shot of the Western Wall, the Dome of the Rock and the Al-Aqsa Mosque. There is another viewing platform further along but they charge around 10 Shekels, and I don’t believe the vantage point is as good.
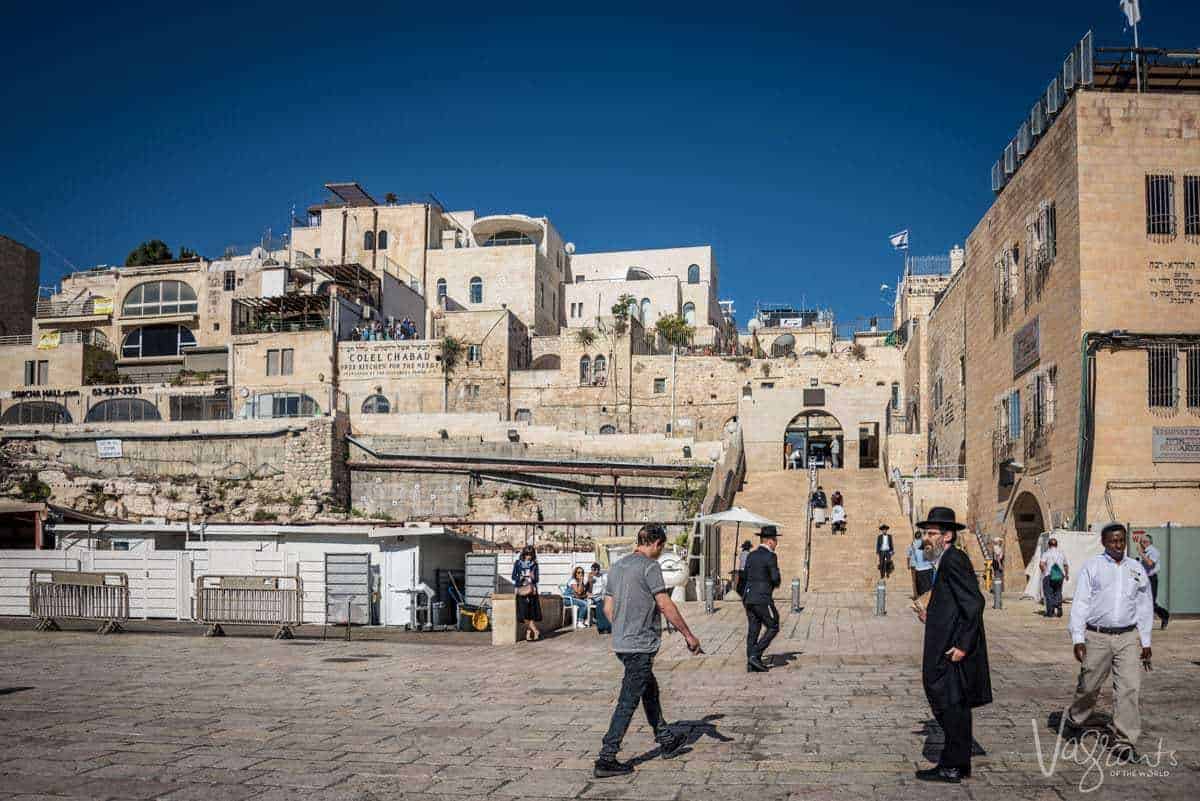

This viewing area can get quite busy during the day, as you can see in the above photo, but at night, it is relatively empty.
With any night photography, even with a smartphone, a tripod of some description is advisable. There is plenty of room in this viewing area for a full-size travel tripod. There is also a good railing to wrap a Joby Gorilla Pod around as an alternative.
If you don’t have a tripod, even resting your camera or phone on the railing as support and using your timer will greatly assist in getting sharp night shots.
As with the dark interior shots, a wide-angle lens with a wide aperture, if you have one will also help in getting sharper night shots. It will also help you capture the wider scene to incorporate the three major religious sites.

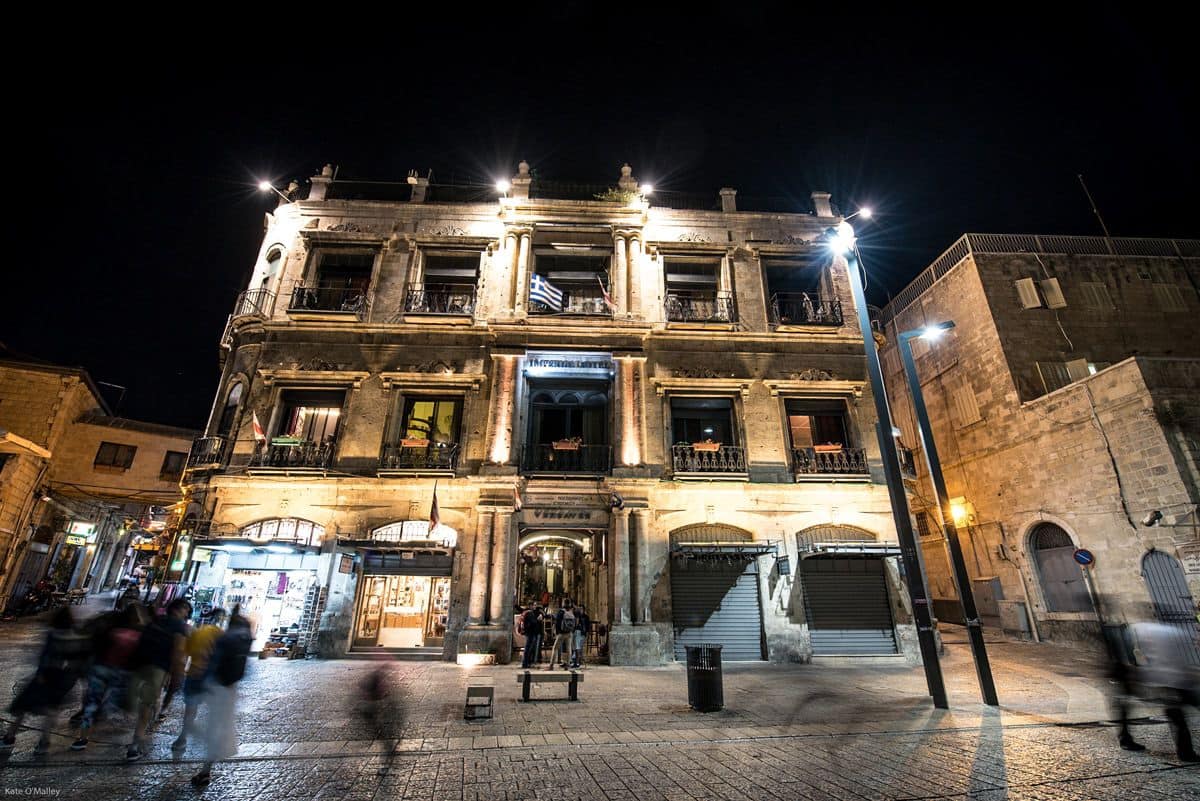
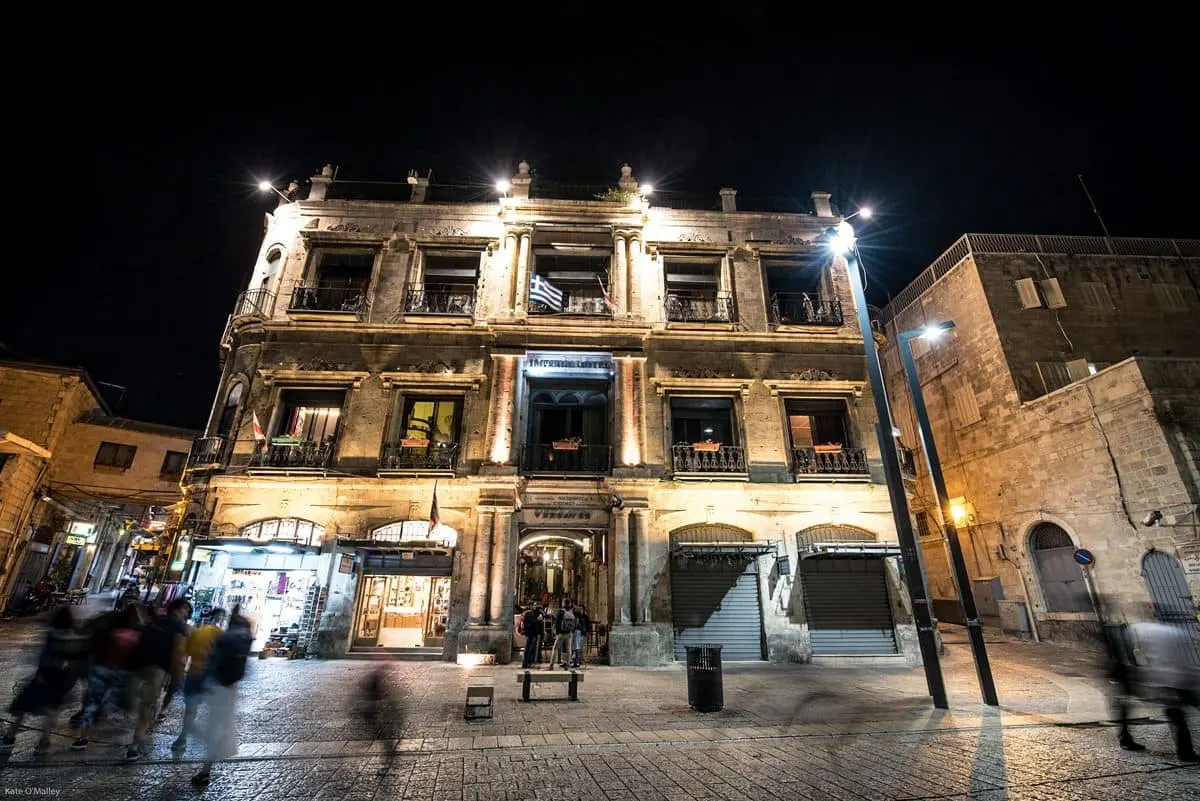
Old City has many beautiful and iconic night photography opportunities but the night is also perfect to take advantage of some of the more common aspects of the city. Take your time to look around and see what other perspectives of the nightlife you can capture.
Other Considerations
Safety
Many people will wonder about safety in the Old City of Jerusalem. For the most part, yes, it is safe. There is also a strong military and police presence to enforce this. However, there is still a degree of political volatility in Israel so situations could flare up at any time within the Old City. As with many places in the world, it pays to be vigilant, but we would not be put off by the current political situation.
As with anywhere in the world, be mindful of your belongings in crowded areas. Pickpockets can be a problem.
Security
When entering the Western Wall Plaza, you will have to go through a security screening similar to an airport screening. This will mean your camera gear and bags will be x-rayed.
Dress
As much of the Old City is made up of religious sites, modest clothing is expected. Men, take a hat with you of some description or, if required look out for the free head coverings at entry points. While shorts are acceptable for men, short shorts may not be.
Ladies, shorts and skirts should be at least knee length and shoulders covered. It is advisable to carry a wide, lightweight scarf with you. You can wrap it around your waist to cover your legs or use it to cover your shoulders.
Our Travel Photography Gear.
Want to know more about the photography gear we use. Here you will find the main travel photography equipment we use as full time travellers.
How we Travelled to Israel.
We spent four nights in Jerusalem and then joined a small group tour of Israel – The 12 Day Israel, Ancient & Modern Culture Tour with Discovery Tours by Gate 1 Travel. We found this a fantastic way to see the best of Israel.
Prices start at $2349 for land-only packages. $3319 for land and air if travelling to Israel from the US.
Check Discovery Tours by Gate 1 Travel for a more comprehensive list of pricing and inclusions.
Where We Stayed.
While in Jerusalem on our own we stayed at the Shani Hotel and at the Harmony Hotel as part of the Discovery Tour with Gate 1 Travel. Both hotels are centrally located, within walking distance of the Old City. Find more great Jerusalem hotel and apartment recommendations here.
Want to experience more of Jerusalem? Try this guide – The Best Things to do in Jerusalem for First-Timers